


-
I think I would have waited putting in the seadek until after the motor and the interior went in. Now you have to extra careful with dirty feet and general dirt messing up that nice new seadek.Leave a comment:
-
Preparing for the engine installation on Monday!
Got the new throttle and transmission cables in today, and I replaced the shift knob too. Looks just a little bit better!
Tomorrow I am replacing the blower hoses (a pain because you have to remove the gas tank to do this right). I'll also throw on the new fuel filter then.
All of these parts came from NautiqueParts.


Leave a comment:
-
Seadeck looks cool, really like the white color you chose as well. Drawing lots of inspiration from this thread. Thanks.Leave a comment:
-
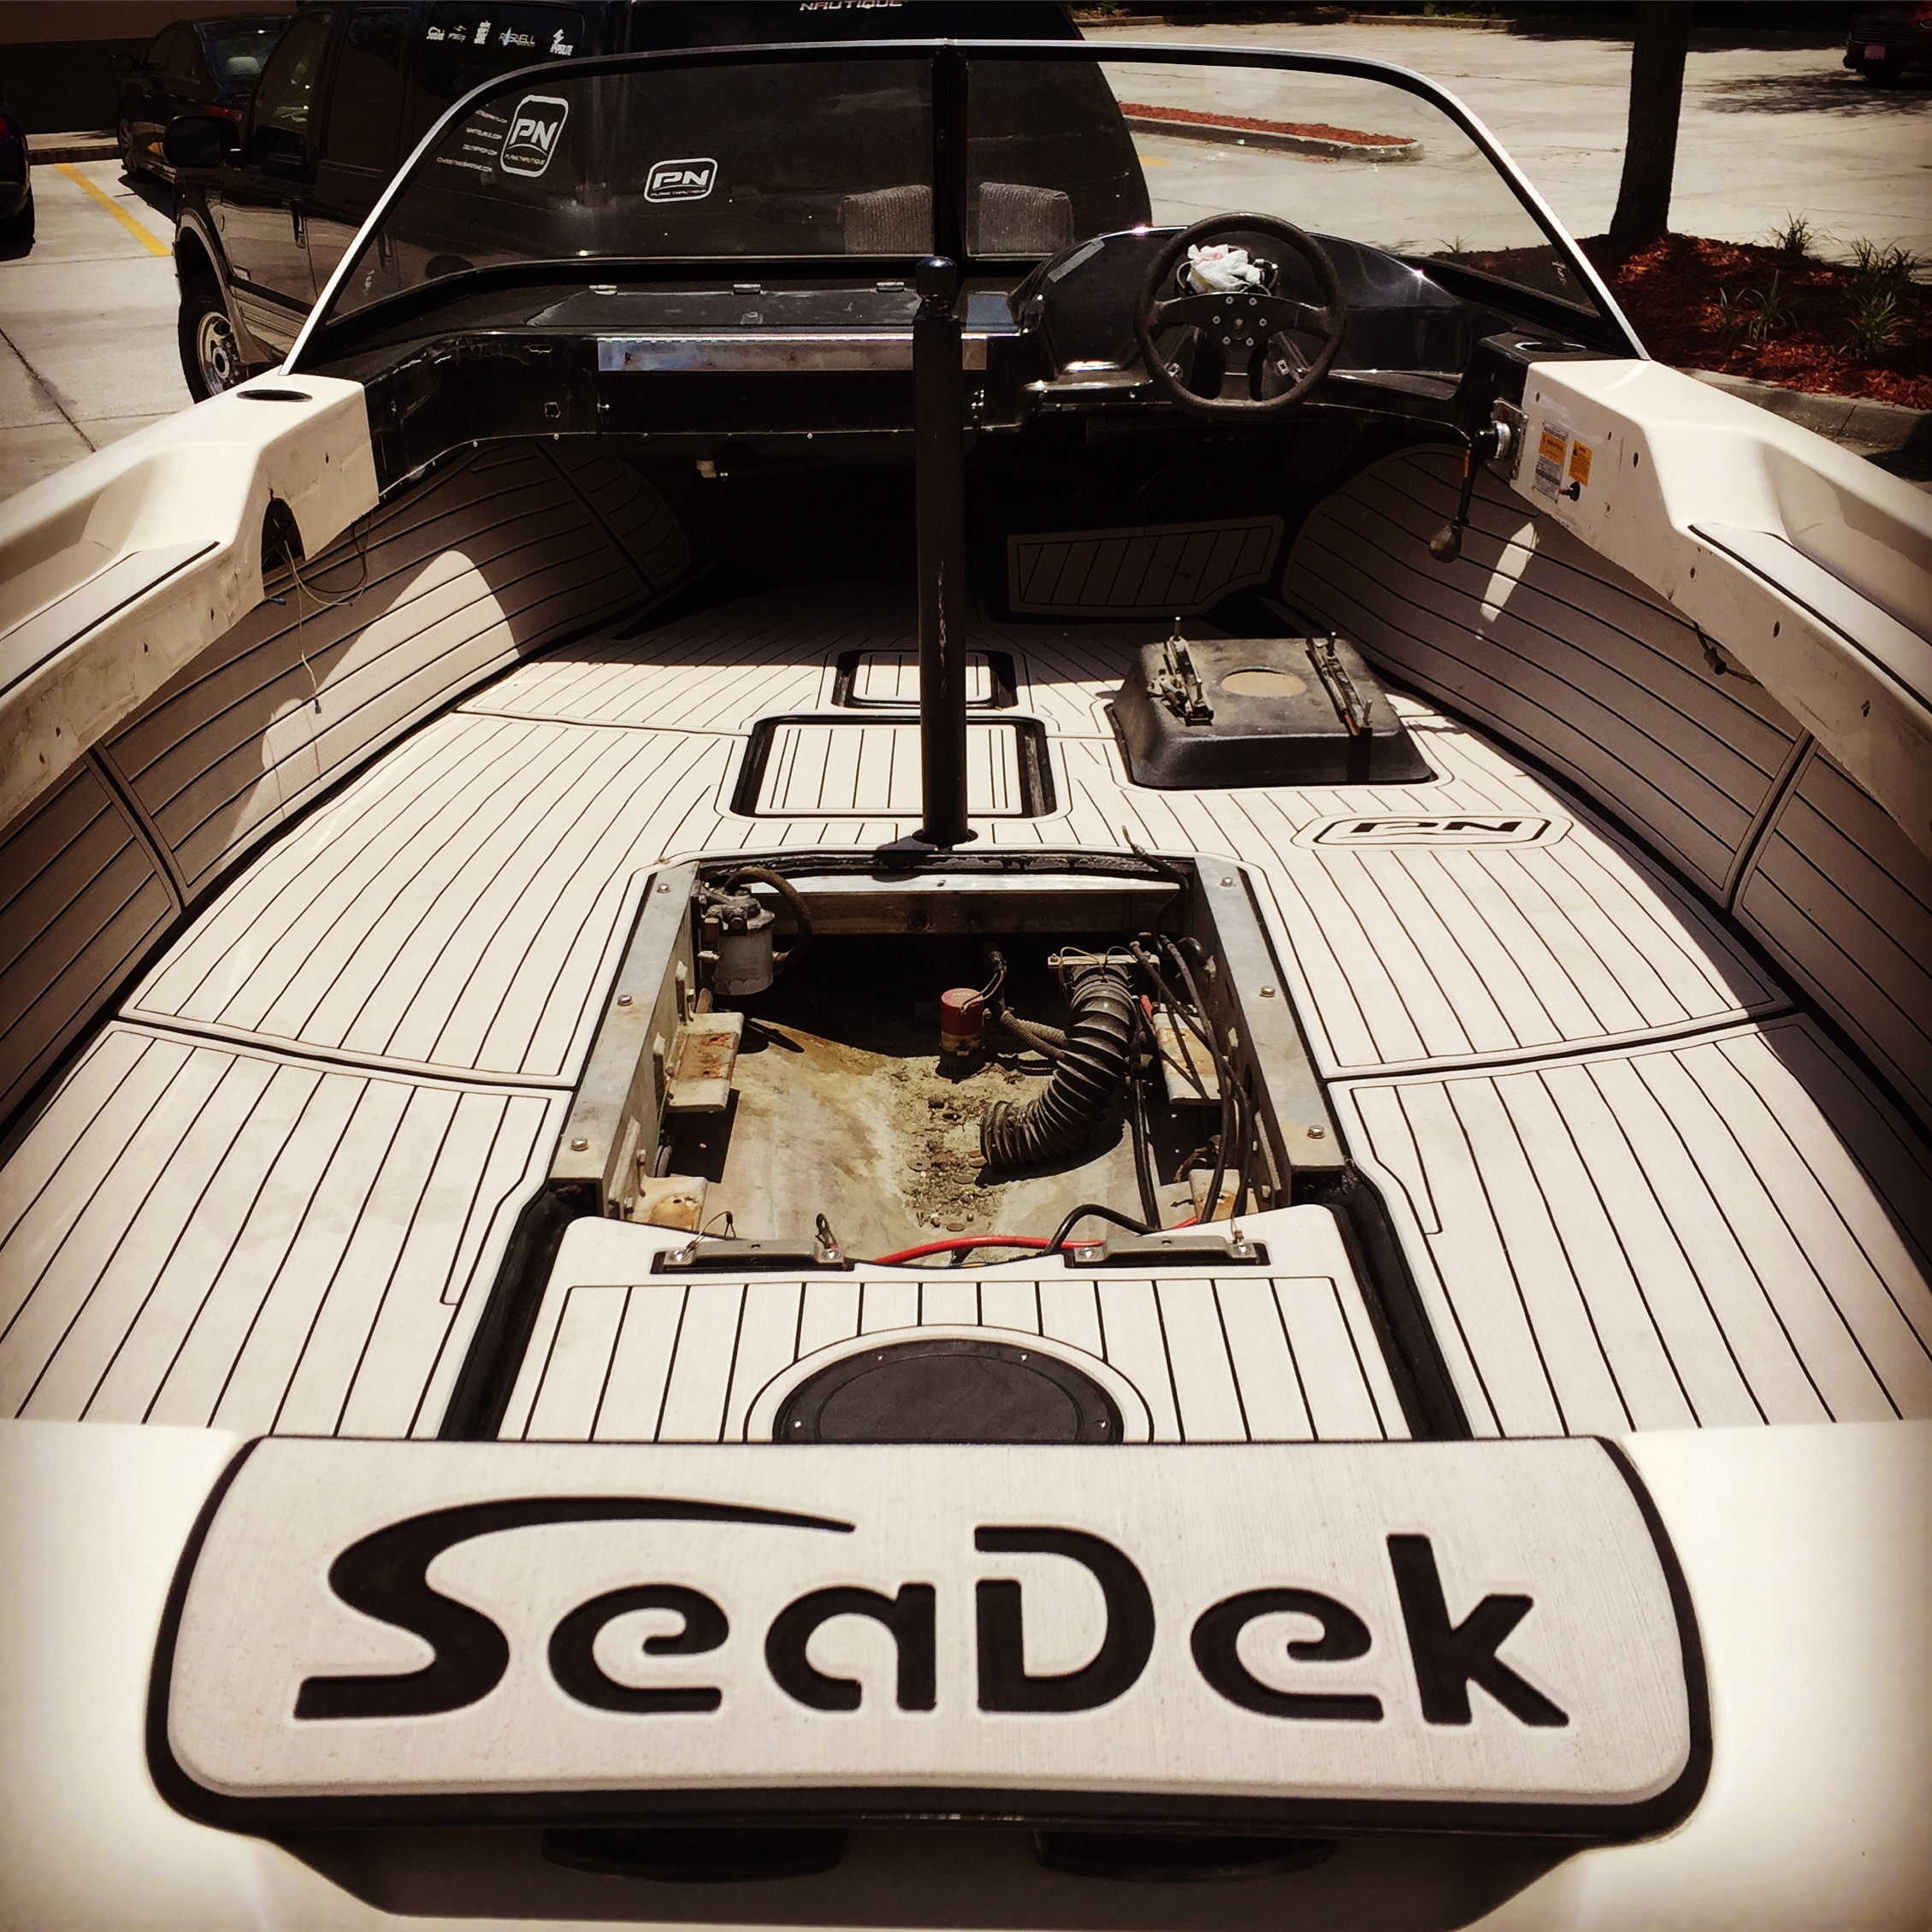
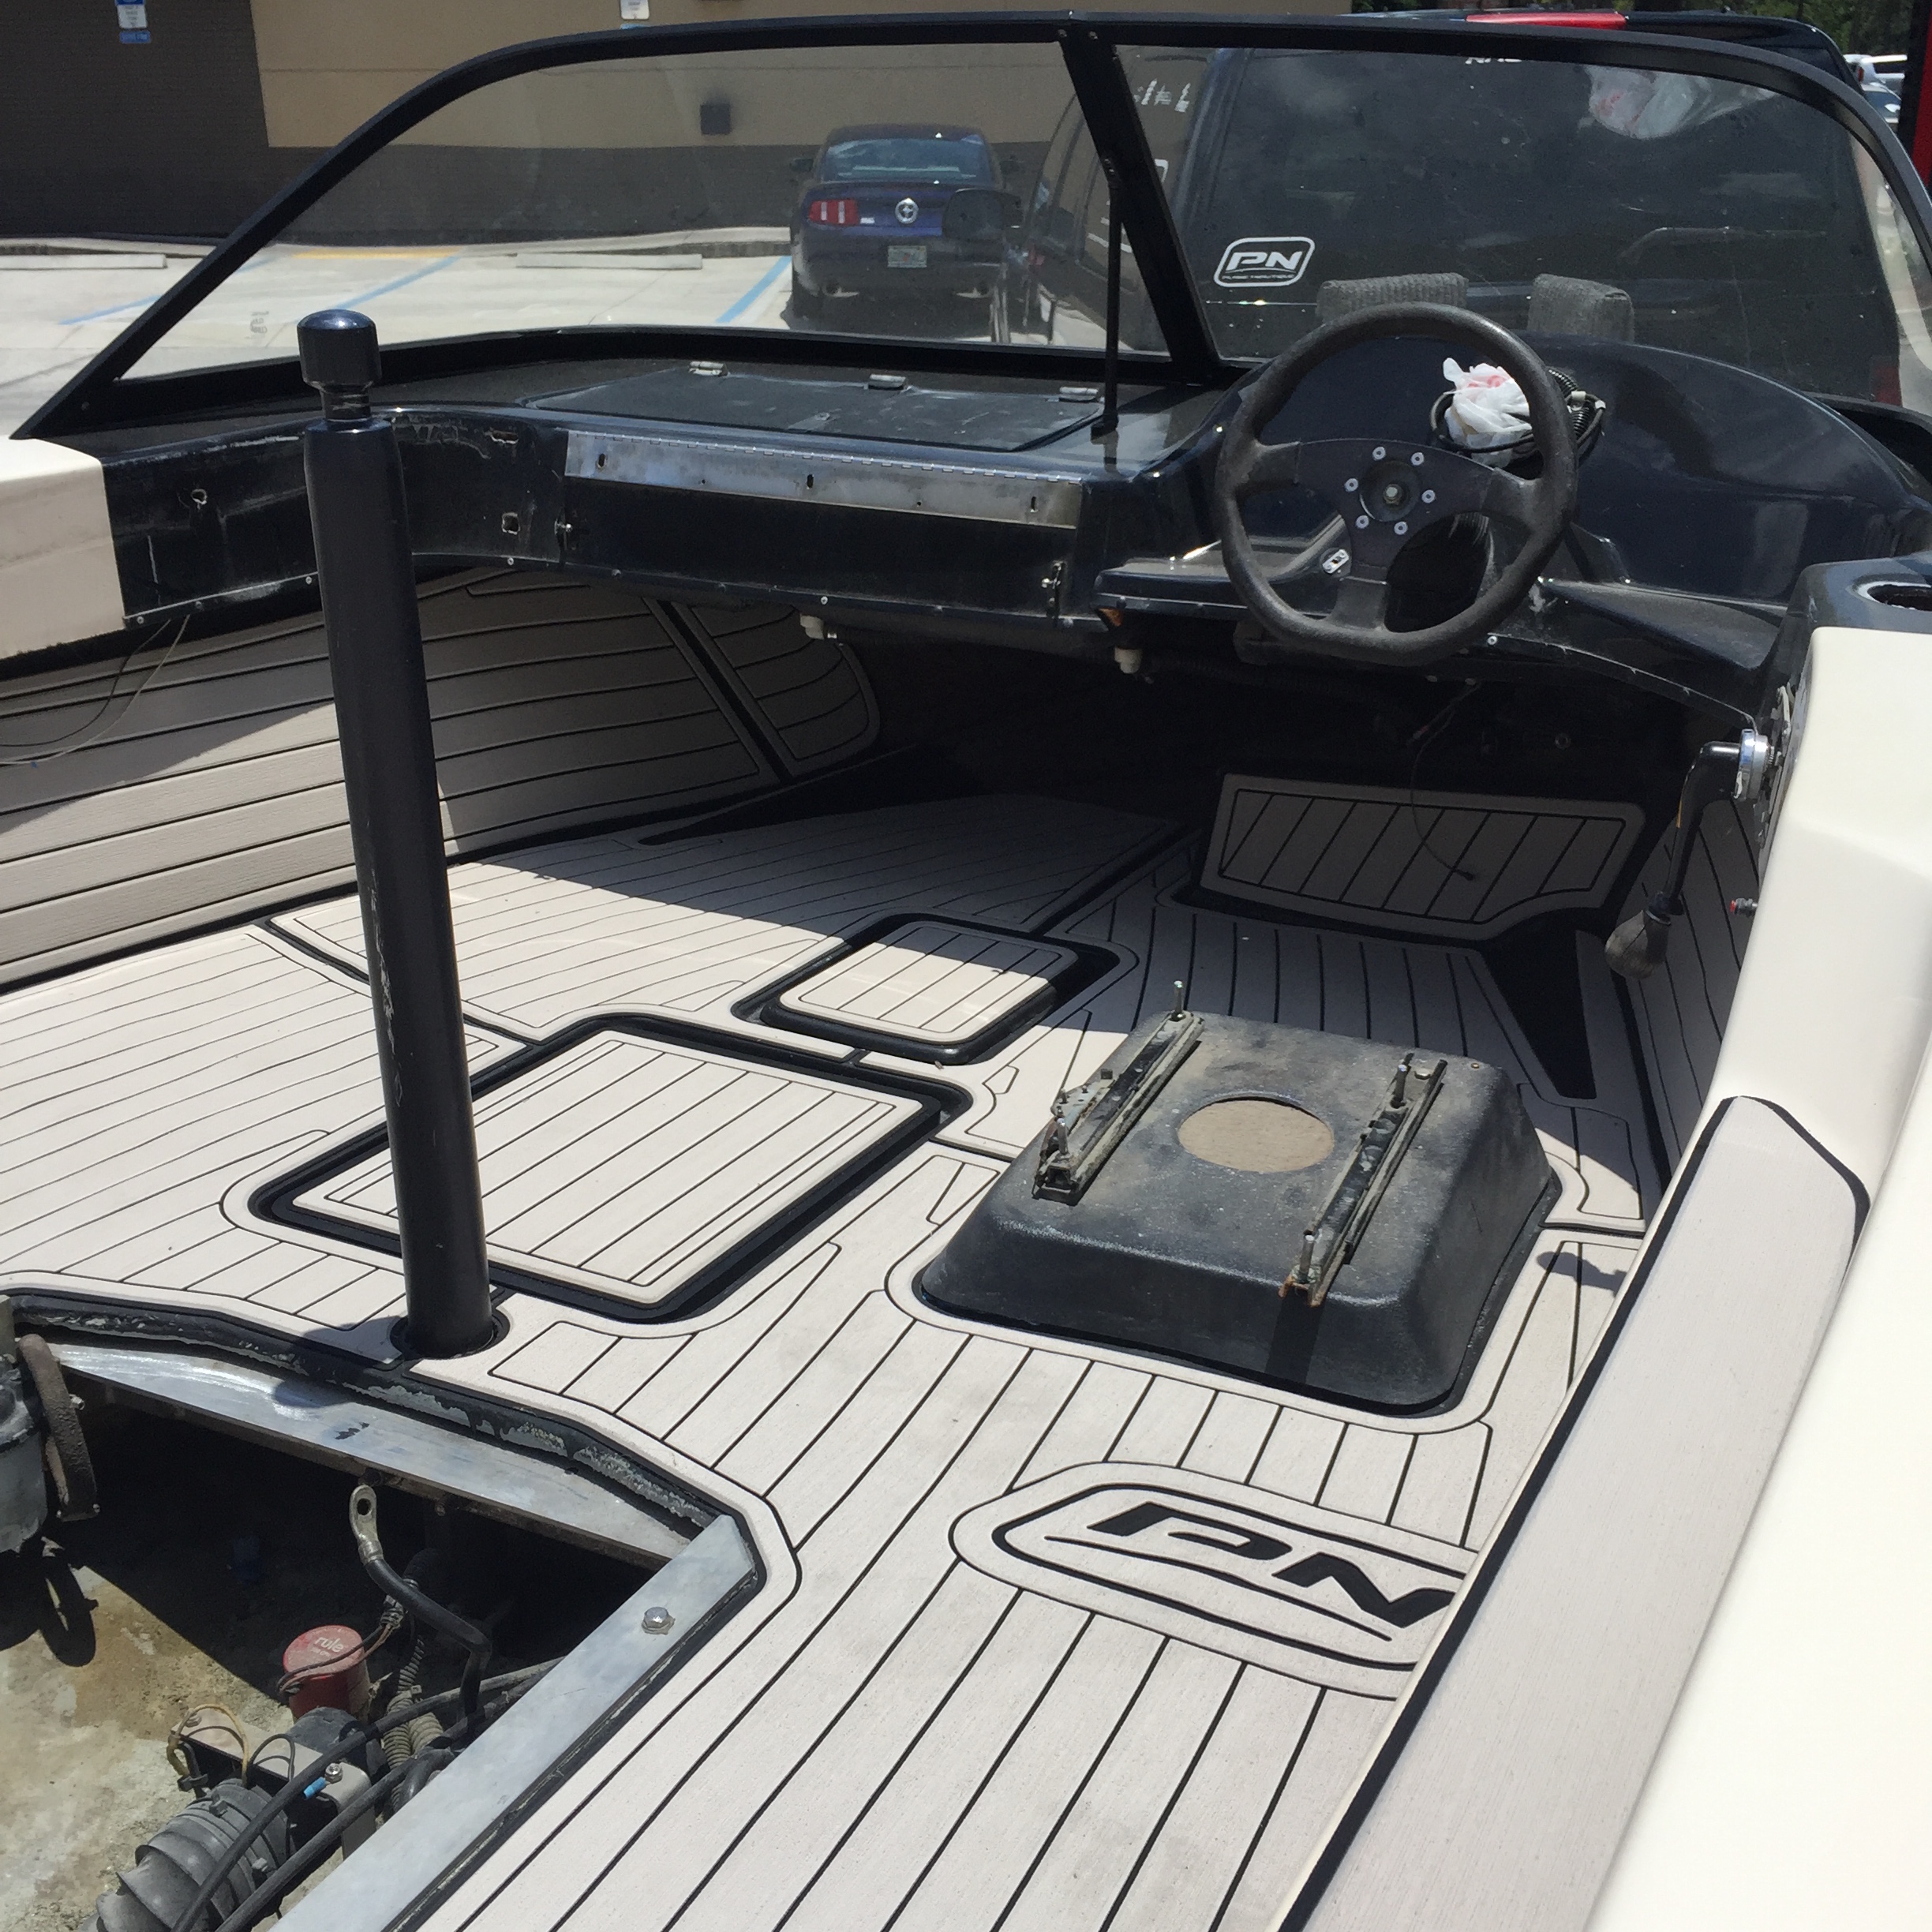
OK, got it back from SeaDek today!
I love what they did with it. Still looks classy!
Engine goes back in next week! Can't wait for that!!
Leave a comment:
-
Nothing to report yet. The boat is still down at SeaDek. They're working their magic. I should have it back soon, and then the updates will resume.
**Sent from my iPhone using the PLANETNAUTIQUE Mobile AppLeave a comment:
-
Hey Jeff! Any updates, We haven't seen anything happen for a few weeks now...
Leave a comment:
-
This is my favorite thread on the entire site. I love restoring things, and whenever I get around to convincing the wife that we need two, and not just one, Nautiques, I want to restore a 97-01 vintage SN too. Nice work, Jeff. Amazing work, actually.Leave a comment:
-
thats awesome taking it apart and sanding each peice individually. Going the extra step always proves to be worth it in the end . Looks like brand new now nice job.Leave a comment:
-
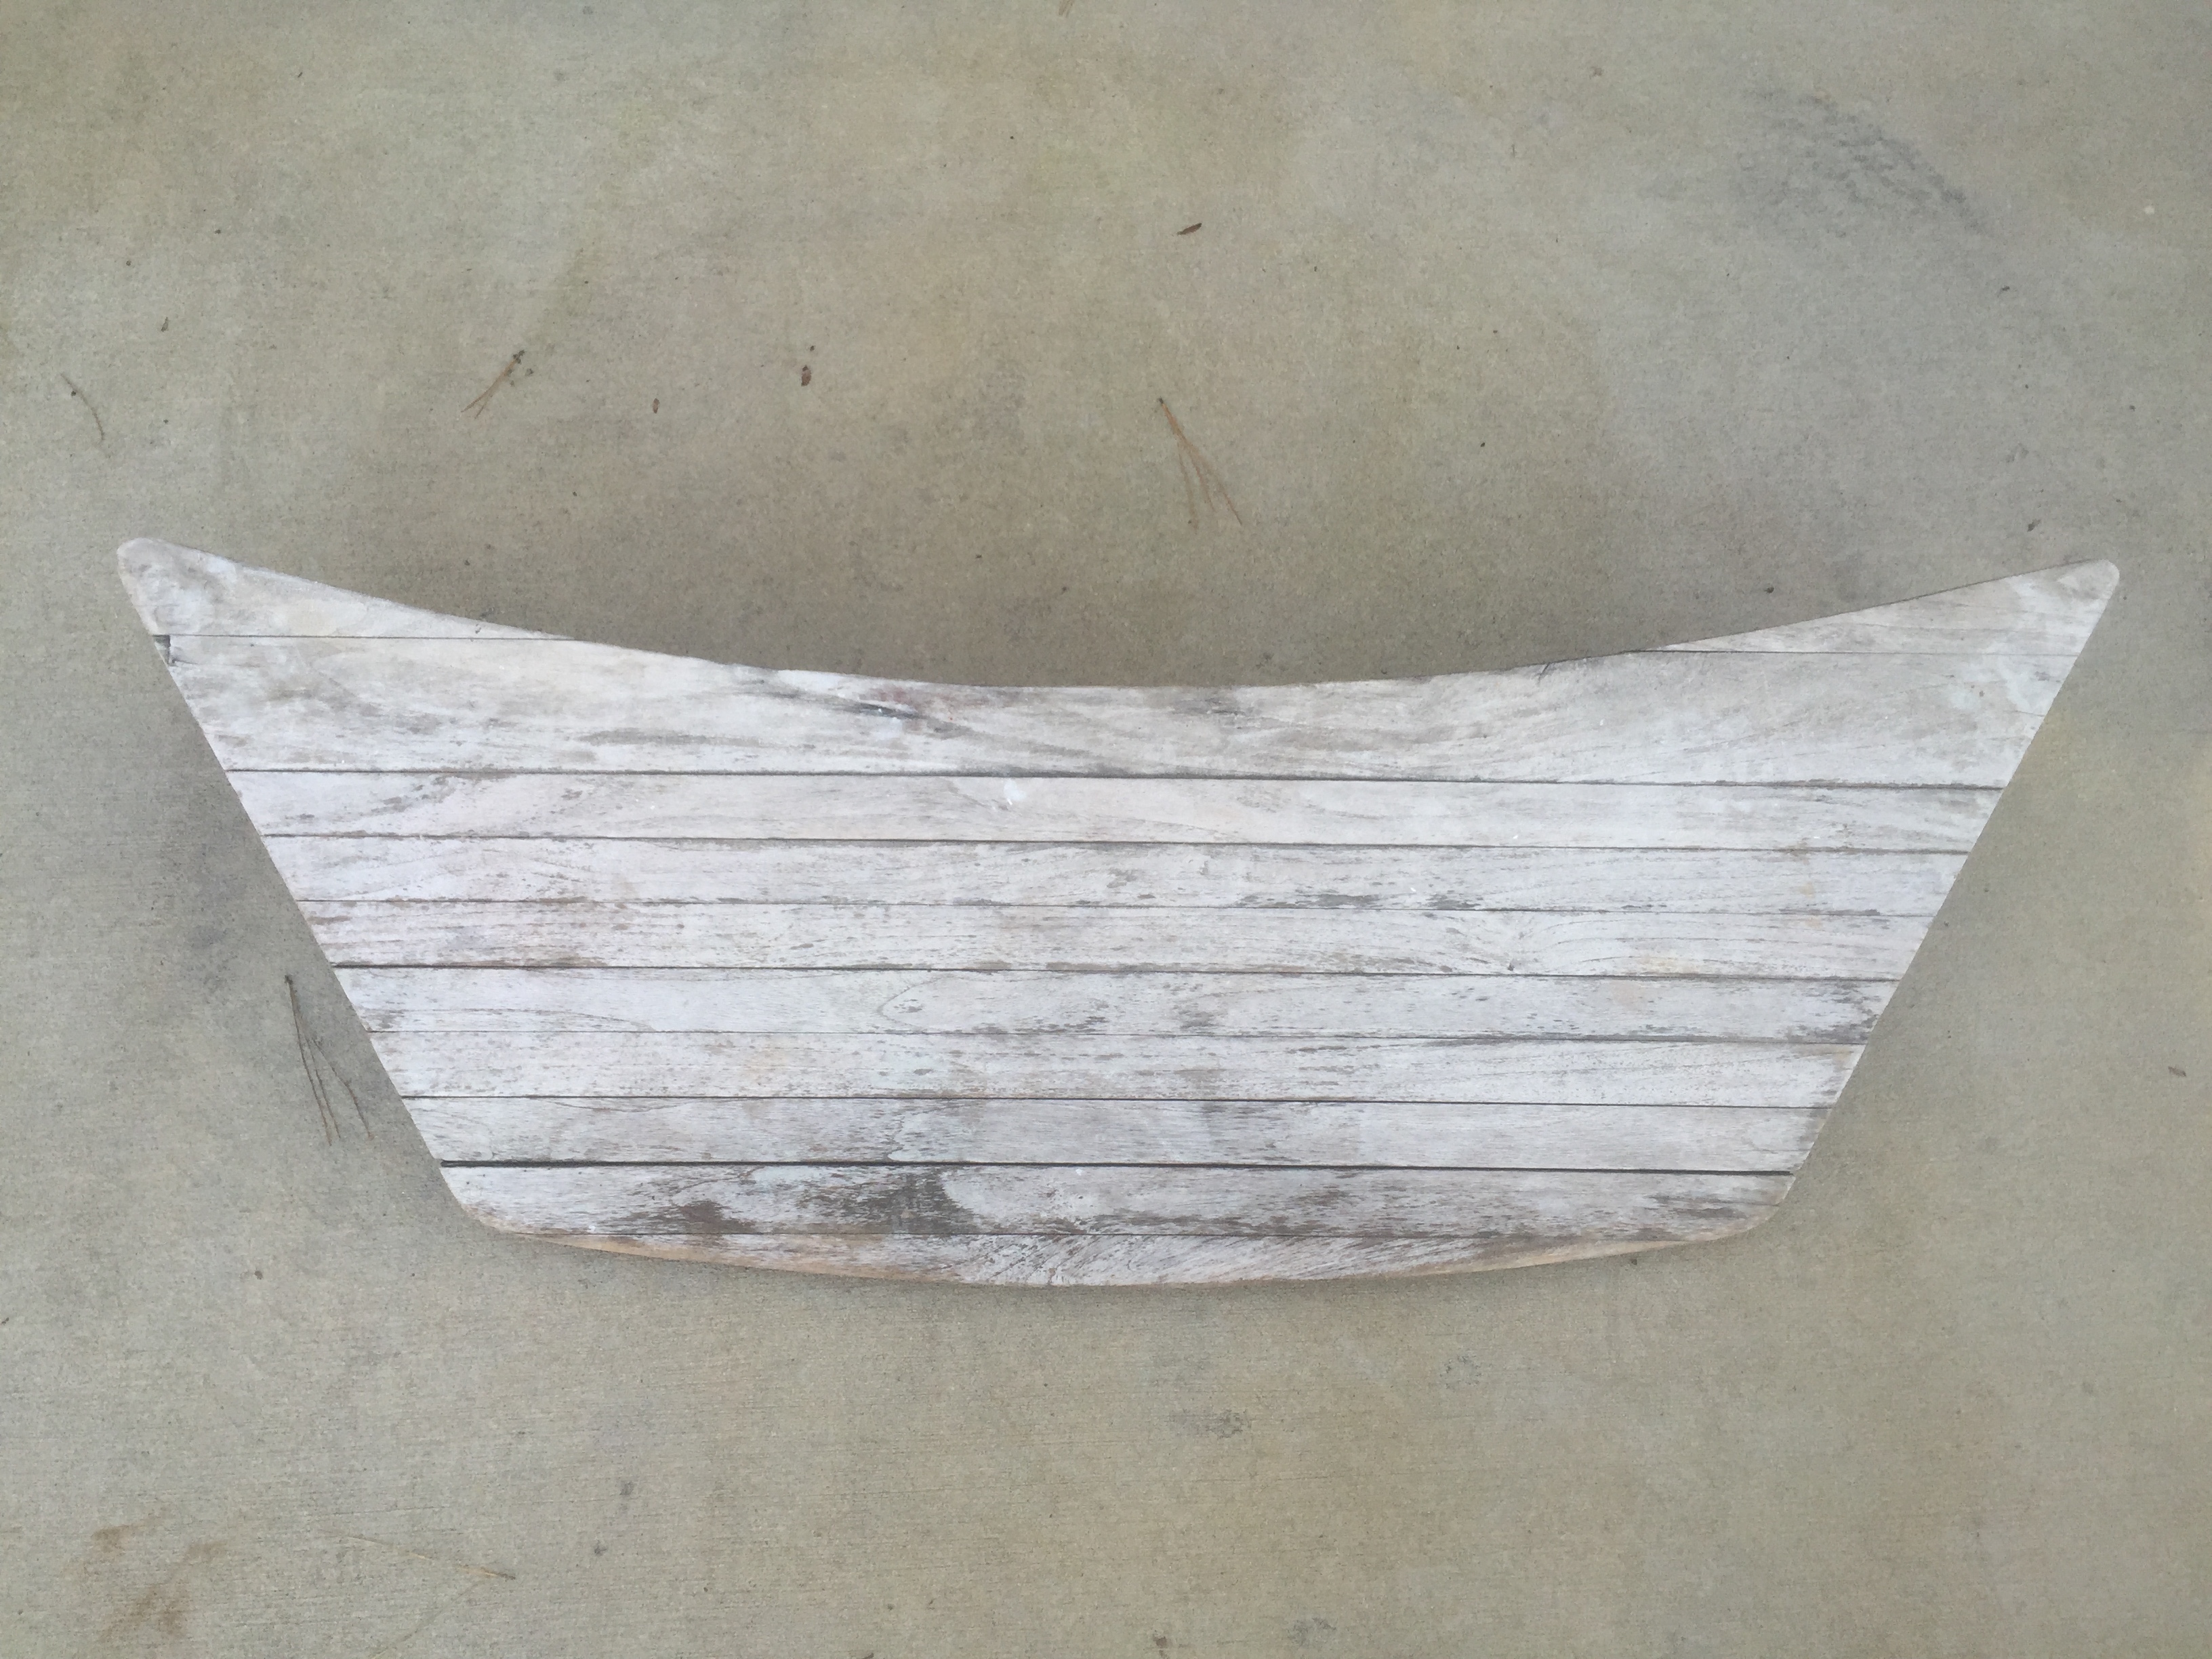
The boat is still down at SeaDek having the floor installed. While it has been down there, I have spent some time reworking the swim platform.
Here's a shot of it before restoration. I don't think the previous owner ever even oiled it!
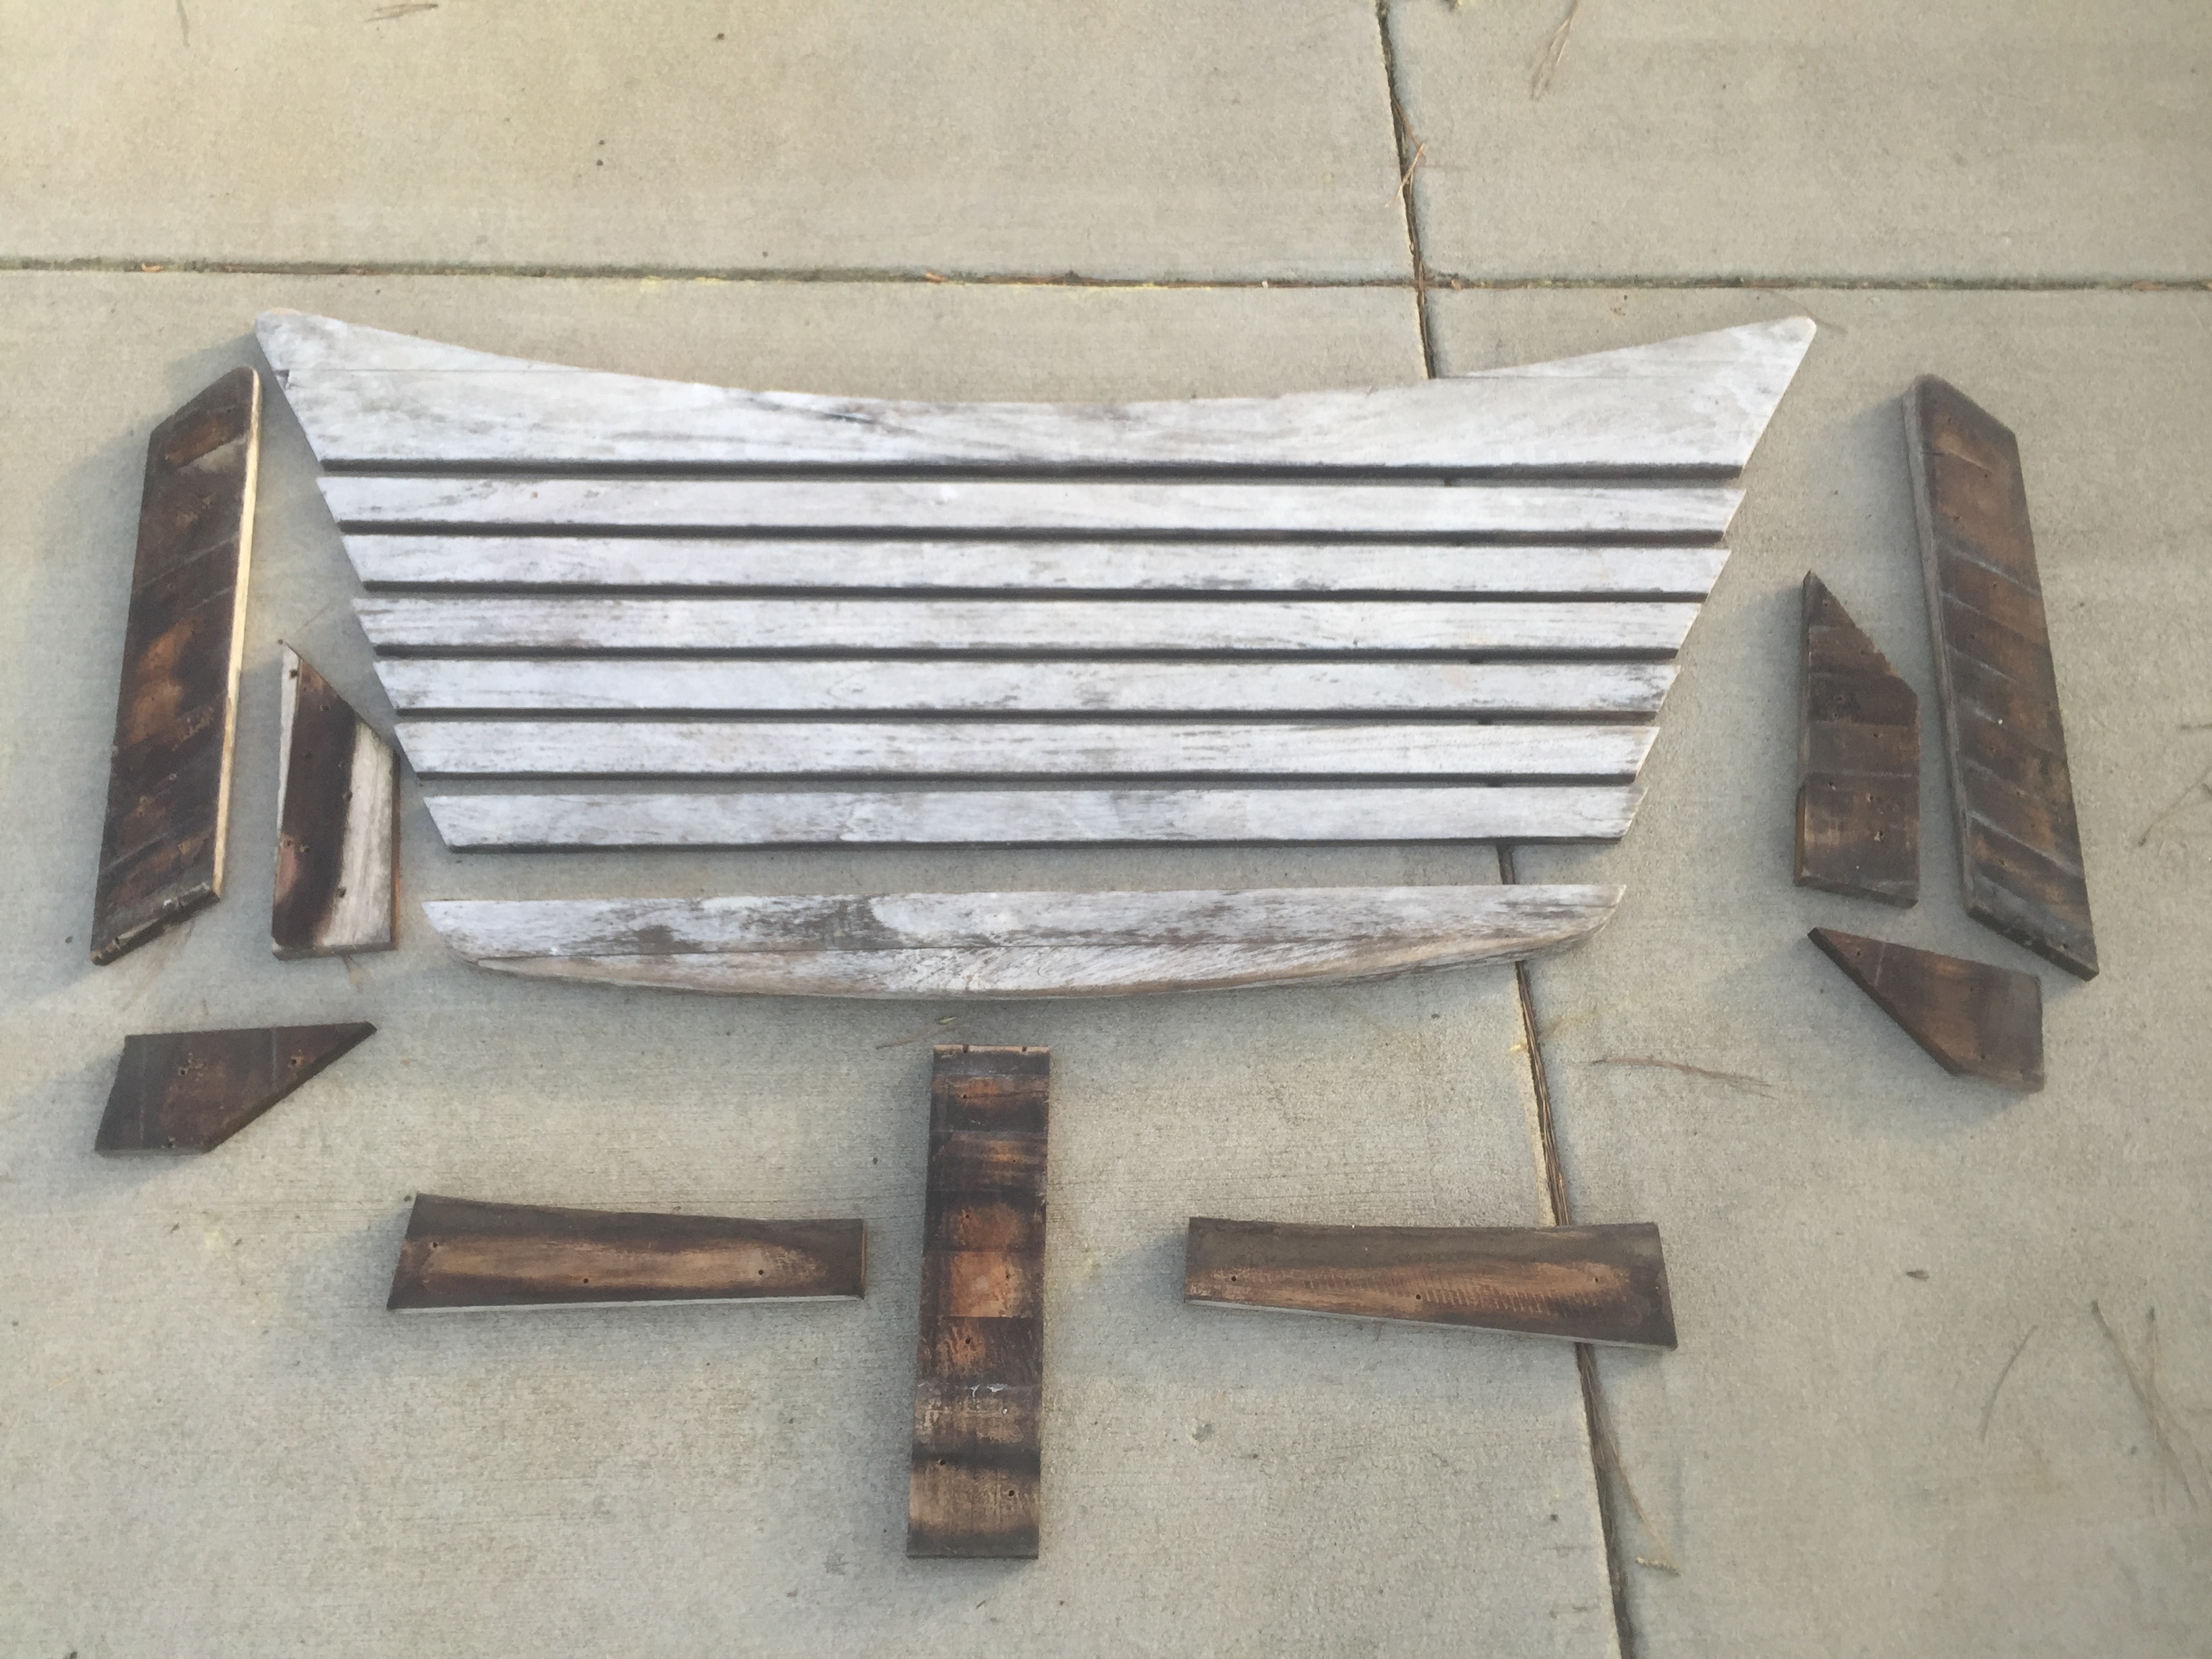
I took the whole thing apart, since there were several chunks of wood missing that required major sanding. There were also several screws protruding through the wood. Not something I would want to step on! Here's the disassembled platform.
I sanded each piece with a belt sander, and then finish sanded them all by hand. I then reassembled everything. Here's how it looked after that.
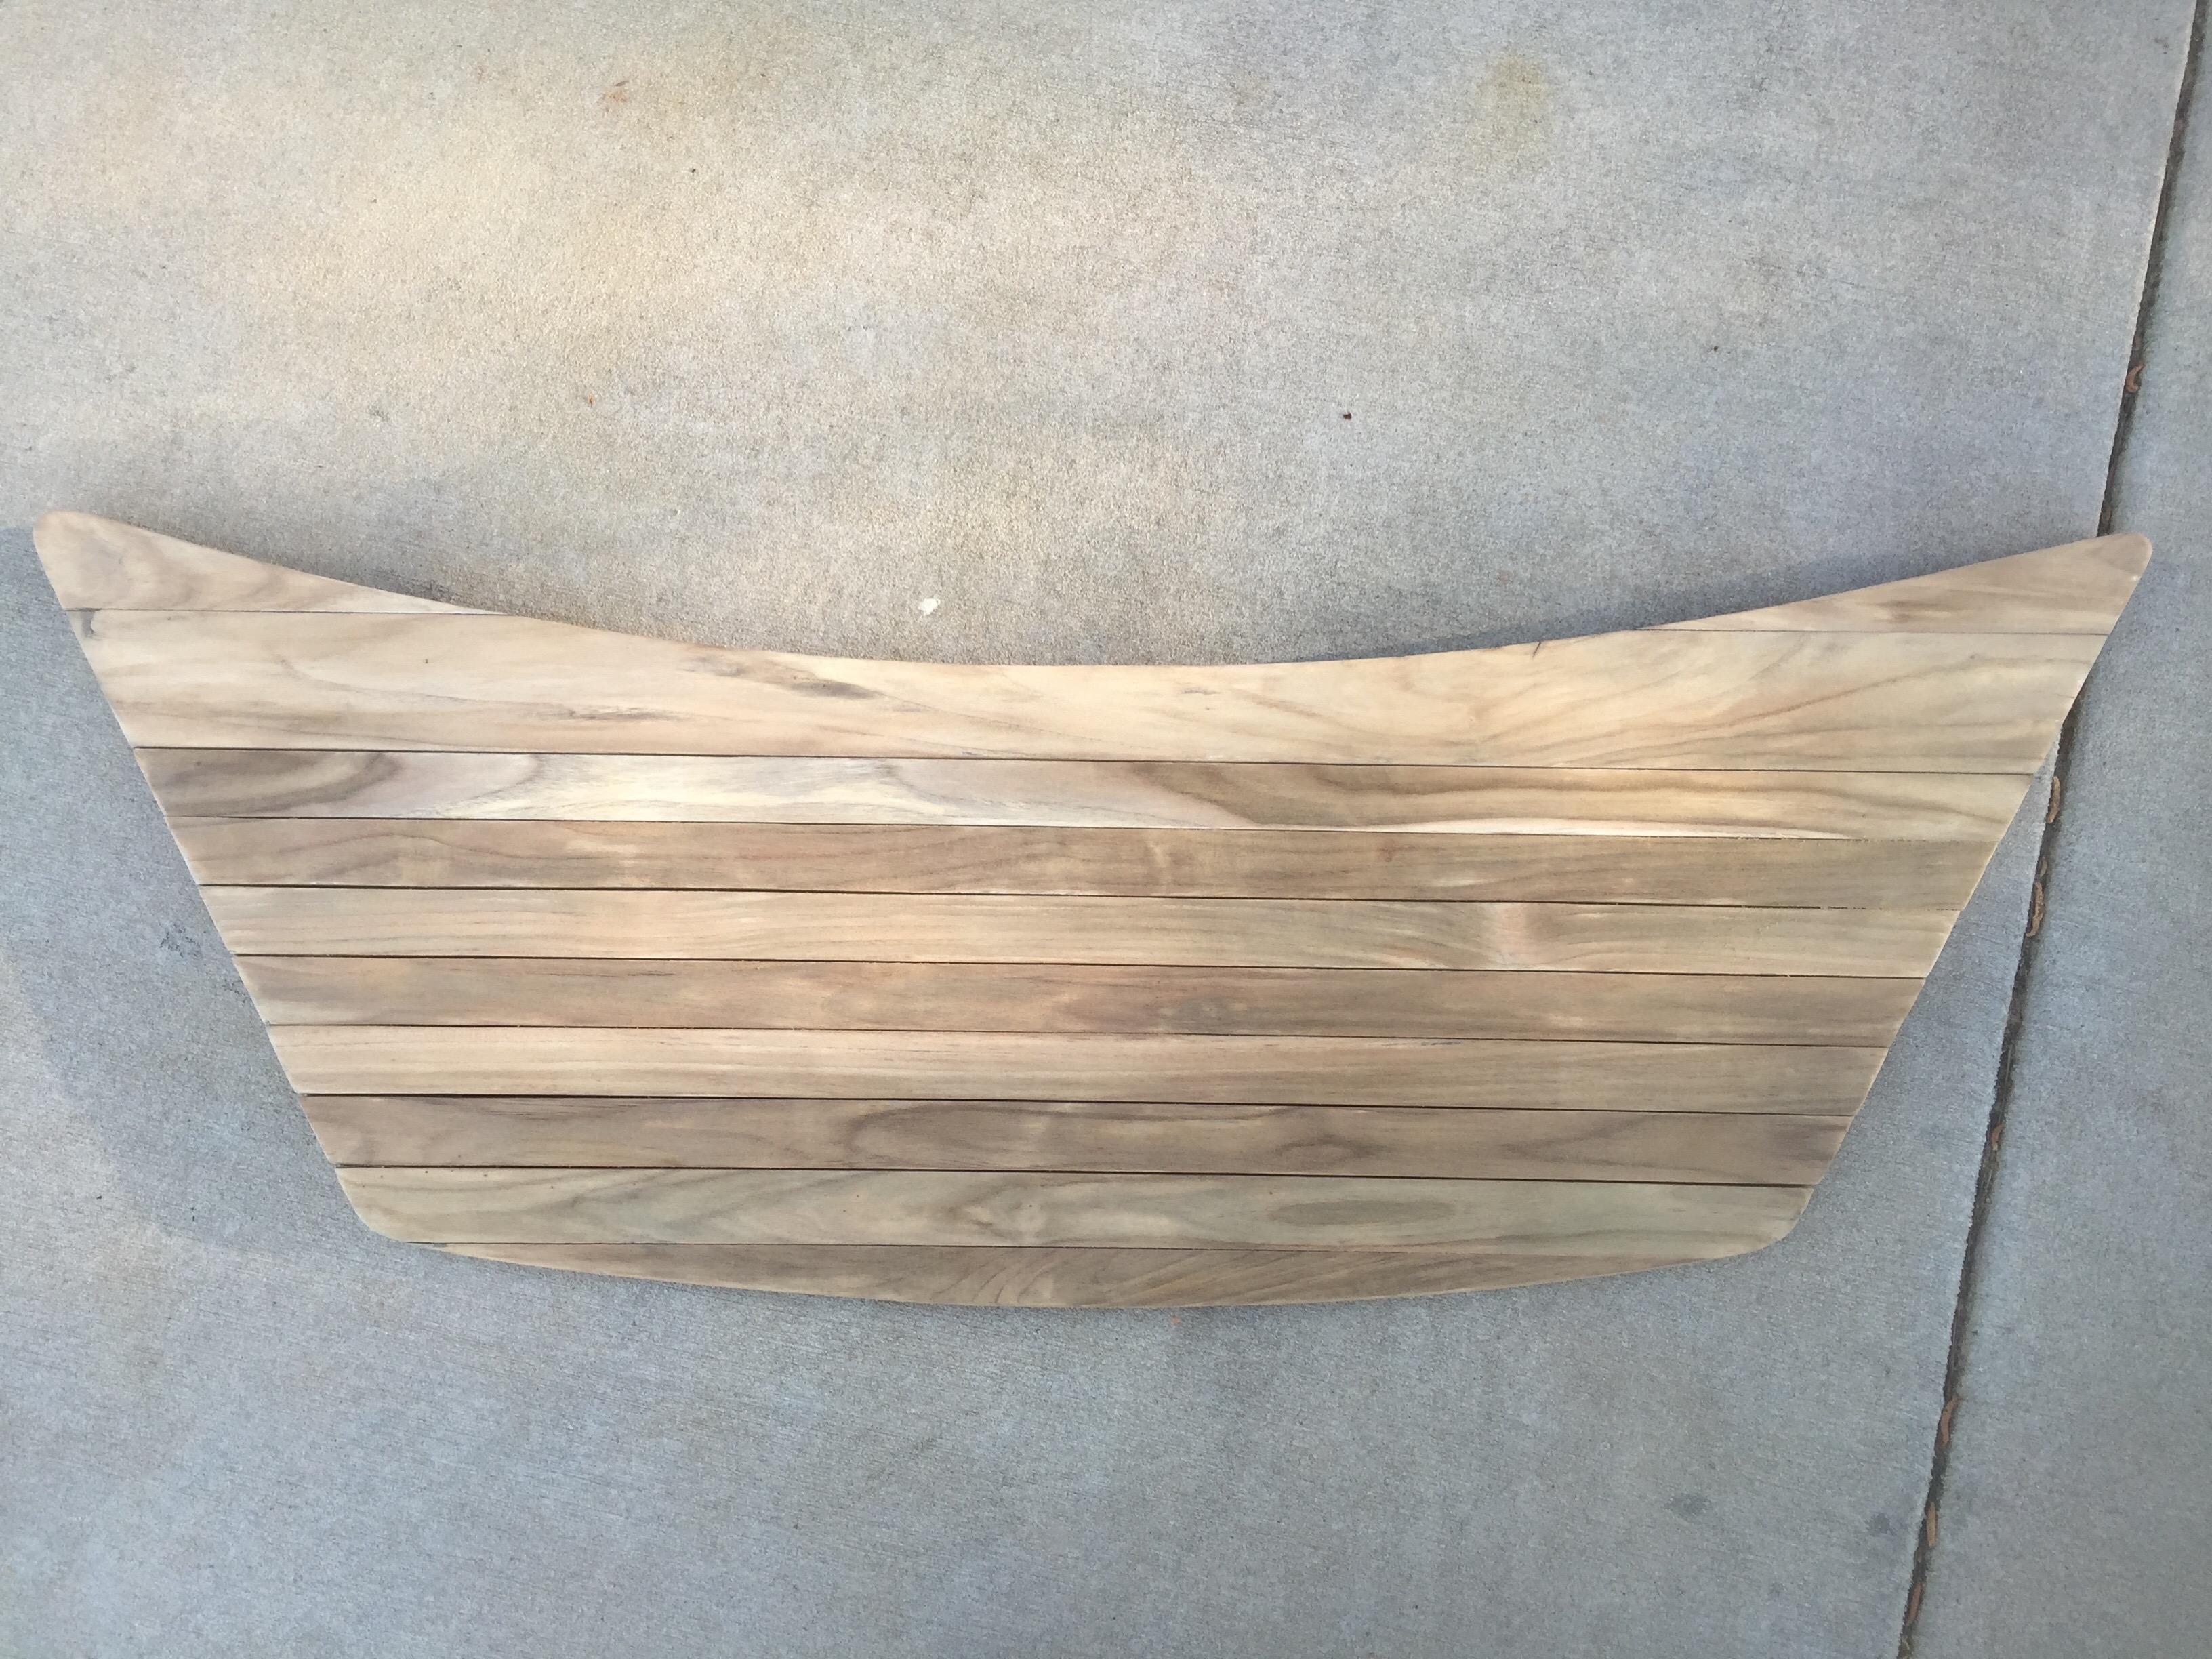
Here's the finished product, all oiled up and ready for installation. No more rough chunks of wood or protruding screws!
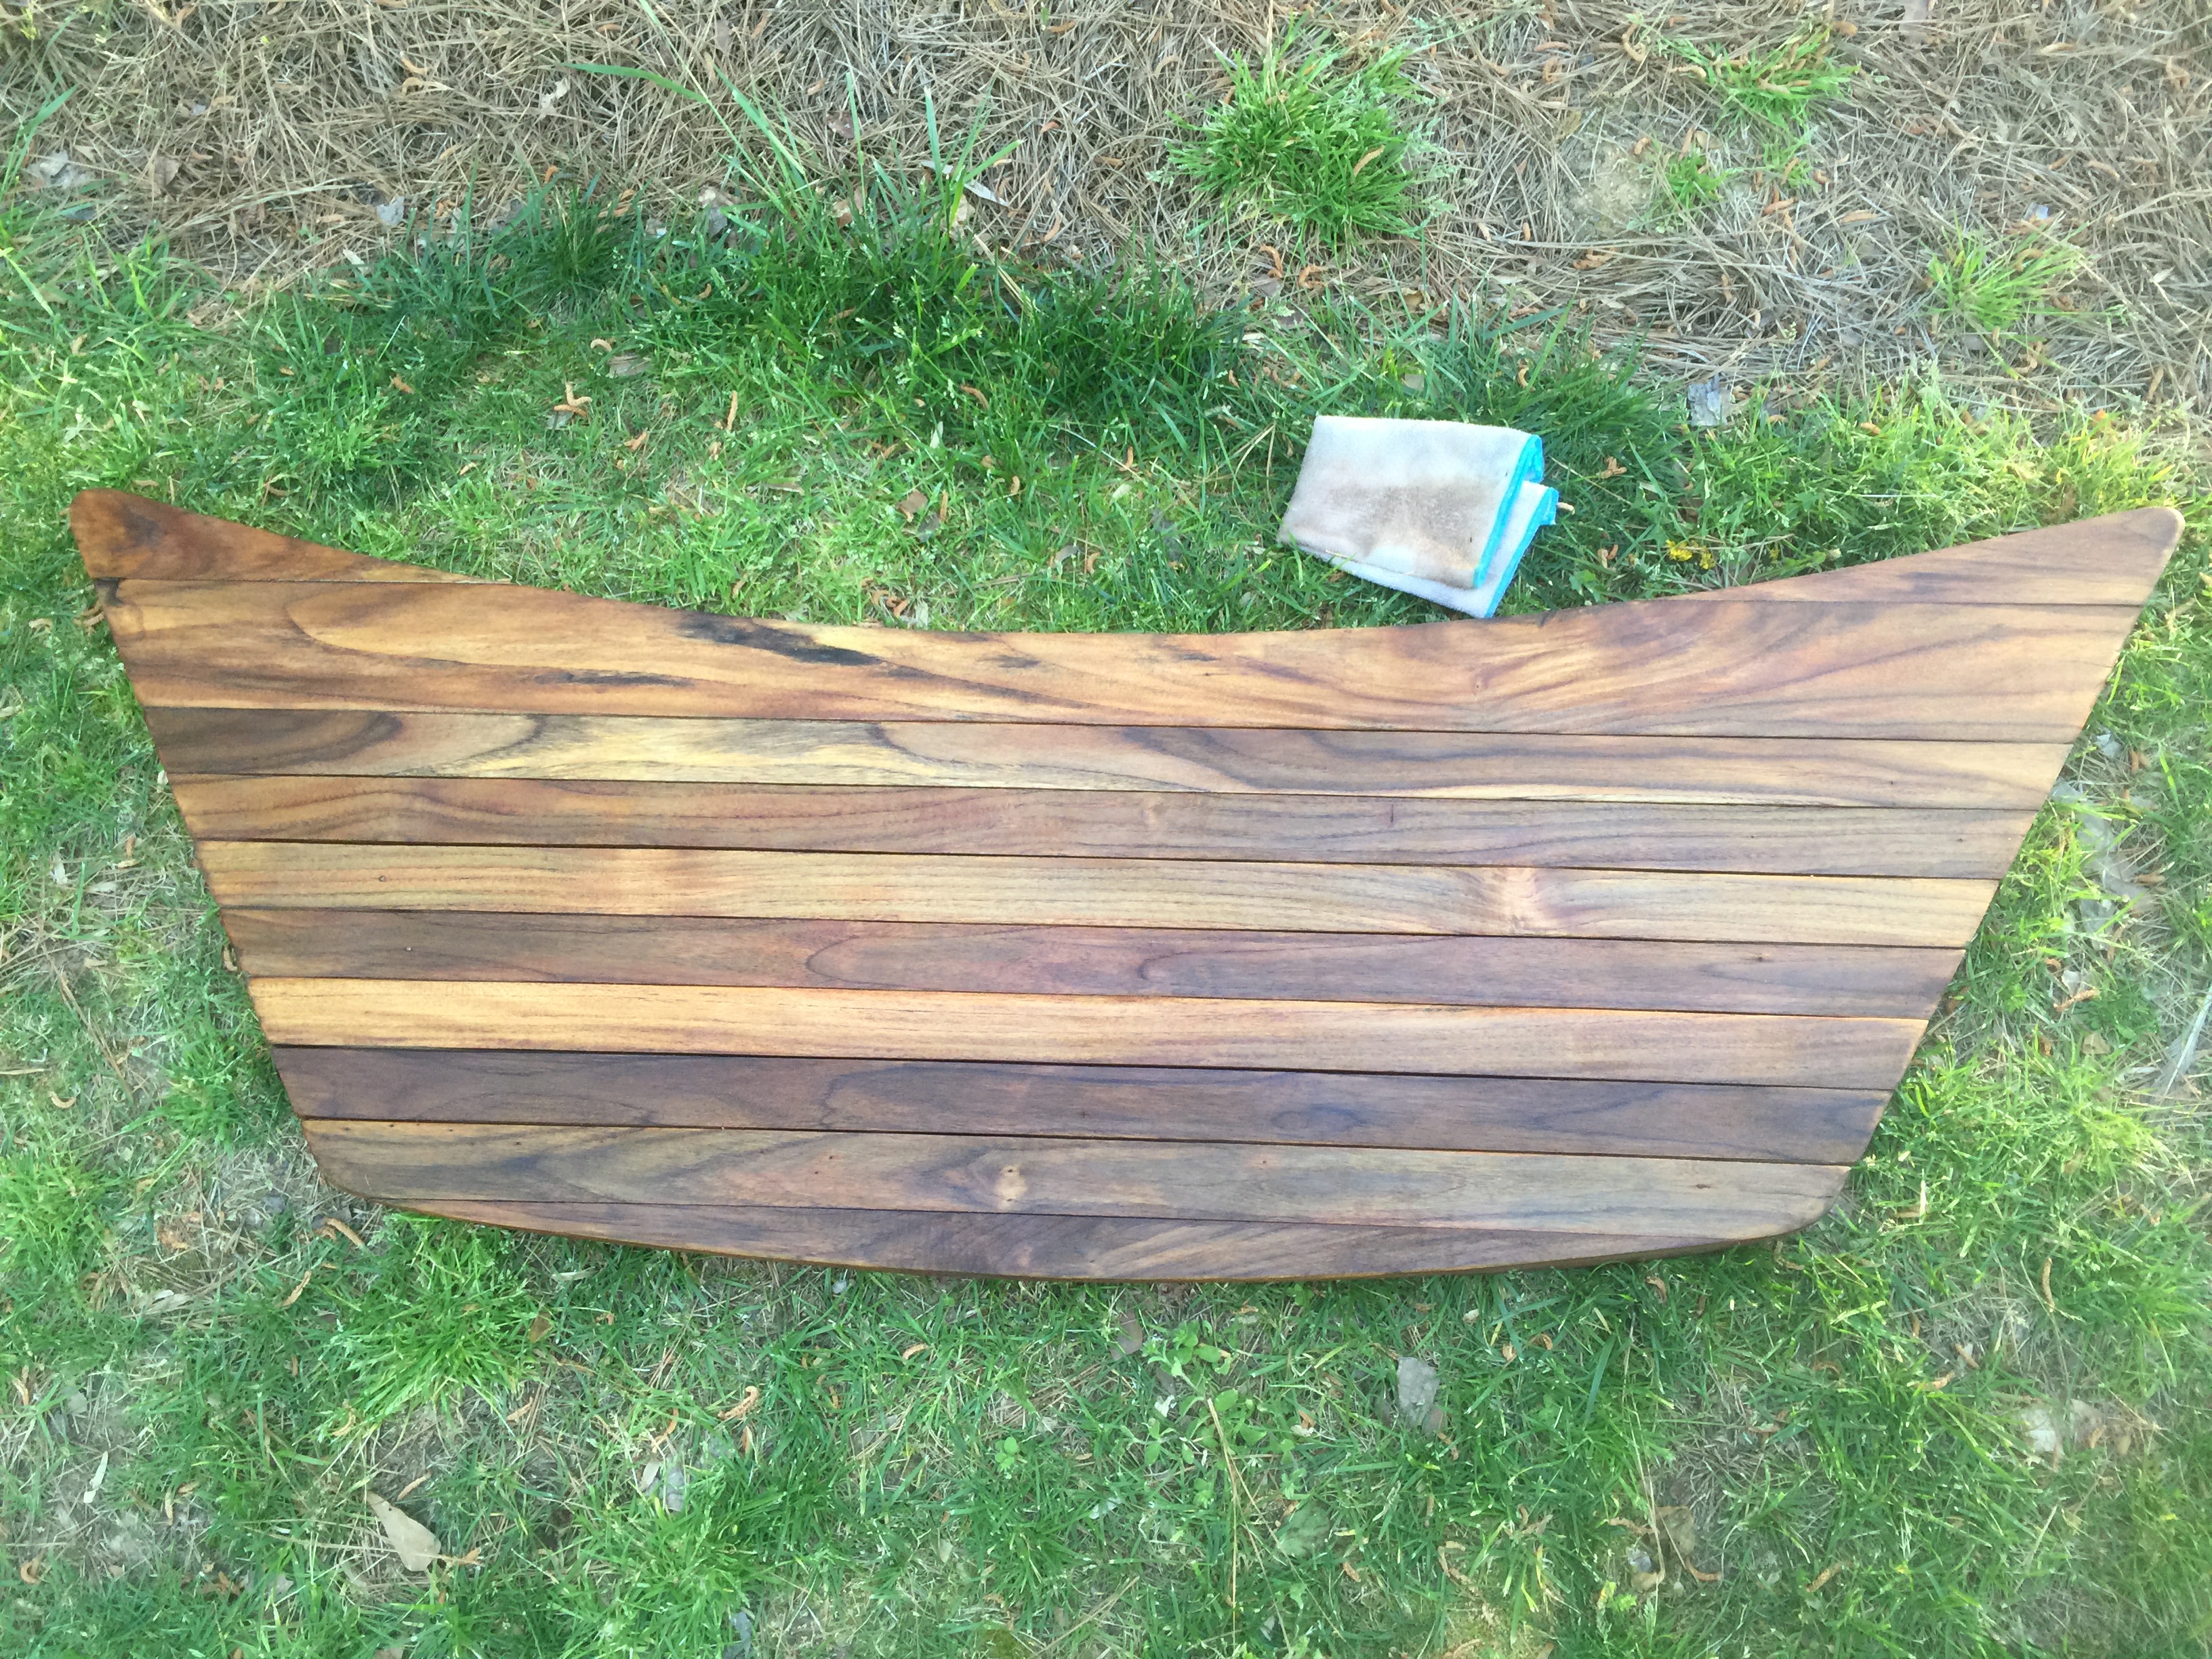
The underside looks as good as the top, although I didn't take any pictures of that. Maybe I'll take some tomorrow. It also got new platform brackets since the originals were broken and discolored.Leave a comment:
-
That's because the newer (Us Regulated since 2015) upholstery has had all the arsenic taken out of it. You'll also start to notice that Darn "Pink" mold that grows on the upholstery as well. And it doesn't go away hardly ever.Originally posted by ScooterMcgavin View PostLeave a comment:
-
Thanks for rub rail lead... Thought nautique parts was just selling the rubberized insert for the rails.... Didn't realize it was the whole kit.Leave a comment:
-
The rub rails are made by Taco Marine. I believe this is the kit used on Nautiques (but I'd suggest you verify the measurements).
http://tacomarine.com/product/V11-34...e-Rub-Rail-Kit
I have found the kit for around $200. Best prices I have found have been on eBay but there are other sellers. Honestly, if I was going through the effort of removing the rub rail, I'd replace mine unless it was in really good condition. There are quite a few videos on replacing rub rails on youtube. Looks like with two people it's not a terrible job but would take a few hours to do.
My rub rail is pretty beat up so this is on my list for next winter.
EDIT: Figured I'd come back and correct this post. The rubrail is not made by Taco but rather a place called integrity marine. You can call and order directly from them for a little over $200.Last edited by Blamey; 05-27-2017, 08:36 PM.Leave a comment:


Leave a comment: