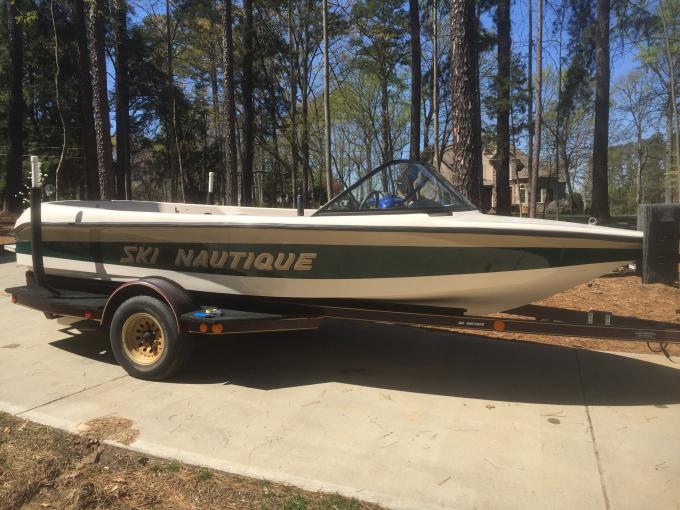
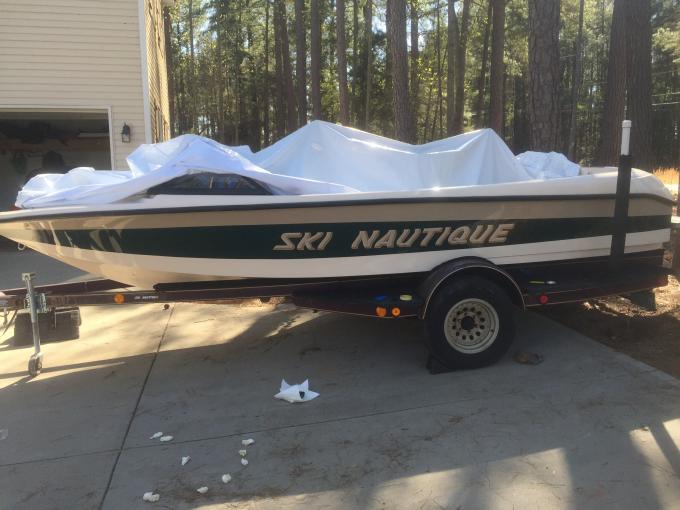
Looks great. And I hate just having to replace my registration sticker!
I'm good @ spending other people's money...time for new trailer wheels now that the boats looks new again.


-
Awesome thanks for the pics of the graphic installation process.Leave a comment:
-
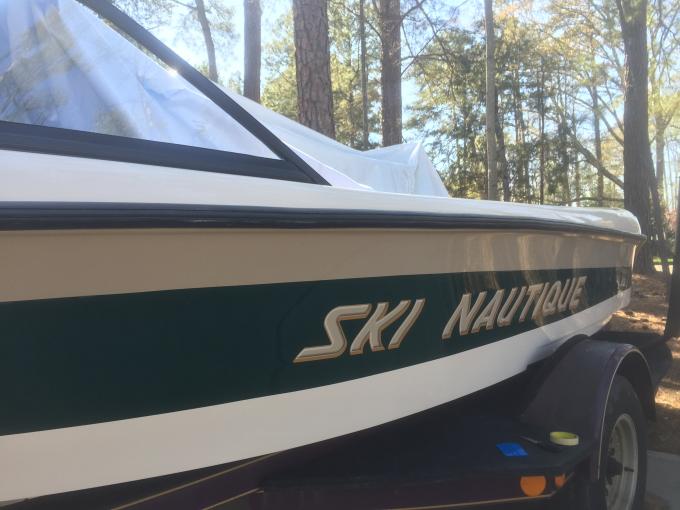
I took the boat back to the gelcoat place this morning, and they knocked the gel down some more on the driver's side so that the old letter locations are no longer visible. I brought it home this morning, and installed the driver's side graphics. Since there were some questions about graphic installation, I decided to better document the installation on the driver's side.
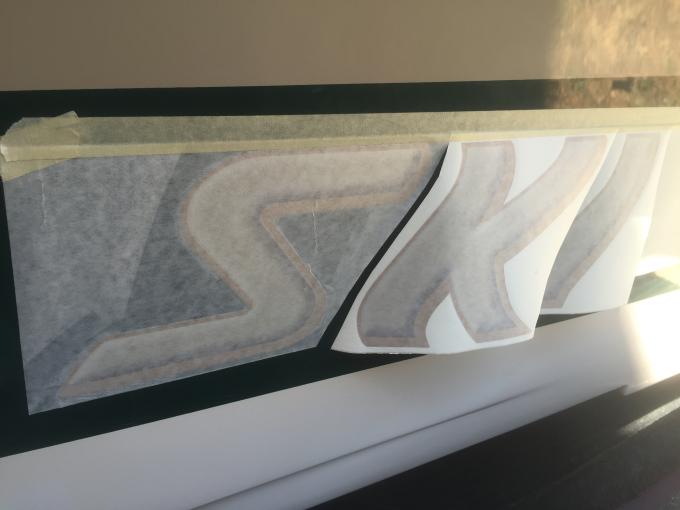
Starting at the end of the windshield, center the graphic in the middle stripe, measuring top and bottom at both ends to get it as close to perfect as possible. Run a single strip of masking tape along the top.
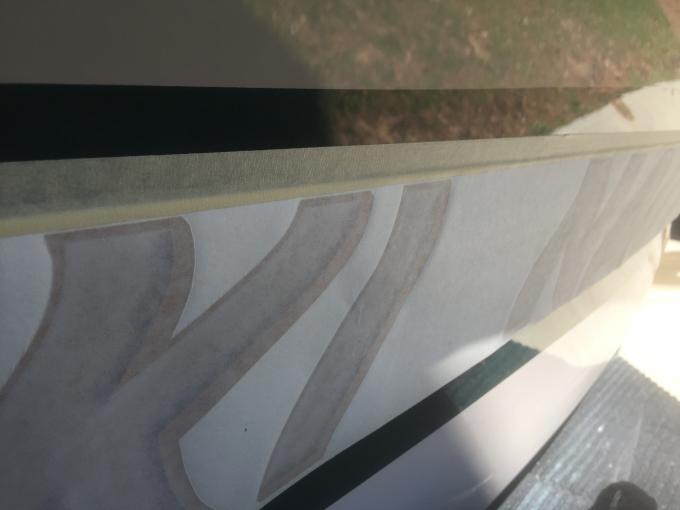
Separate each letter by cutting up toward the tape. This makes the graphic much easier to work with, since it becomes many small graphics instead of one huge graphic.


Flip each letter up (one at a time) and remove the backing. Use a squeegee and apply the letter by pulling down from the tape line. This should prevent air bubbles and apply each letter straight.
Repeat until all letters are applied.
Remove the tack paper from the front of each letter carefully. Inspect for any air bubbles and work those out by hand.
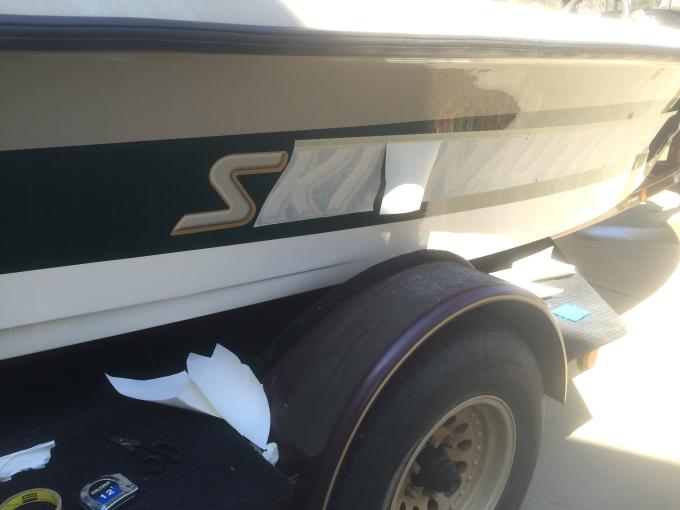

After all paper is removed, check over one last time for any air bubbles, and address as necessary. If you did your squeegee work properly, there should be very few if any air bubbles. Stand back and admire your work!

Leave a comment:
-
Thanks Brit_hunsicker, thats always good to know there are parts out there before you start a project and "something happens"
RyanLeave a comment:
-
If you're talking about the foam piece that covers the screws, NautiqueParts sells the replacement strips and they are rubber. I replaced them on both of my last 2 boats, as I removed the windshields in order to tint them.Originally posted by RyanNoble
Sent from my iPhone using TapatalkLeave a comment:
-
Hey Jeff, the boat is coming along great and I'm just loving the fact that you are doing a project like this on planetnautique. It's just too easy to go after the next new shiny model so good on you for proving you can resurrect a legend like this! Keep up the updates, you are giving us all a lot of courage!Leave a comment:
-
very interested to hear how you go about the dash vinyl. I looked at doing this as well as part of my restoration but got hung up because I could not find unbacked vinyl as was used by nautique on these dashes (at least my 2002 dash anyway). Unbacked vinyl will stretch very easily and it appears to me that nautique used a vacuum bagging process on these dash pods so the unbacked vinyl was basically vacuumed over the dash which allowed it to cover uniformly without wrinkles to the complex curves of the dash pod... Unless you are able to figure out a way to do this I was just going to match the color and use vinyl dye in a spray can which will hopefully makes it look like new. Looking forward to some after pictures of your dash resto and learning more about this.Leave a comment:
-
Wow, its coming along really good. Its going to be a beautiful boat when its all done.Leave a comment:
-
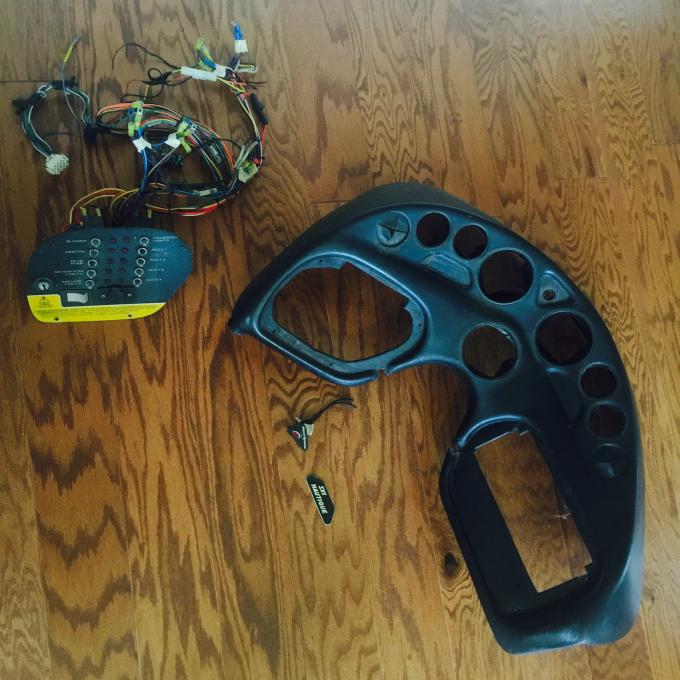
I also decided to go ahead and have the dash vinyl replaced. It is all marked up on top, and I don't want that detracting from this beautiful boat. I pulled out all of the gauges and wiring today in preparation for getting it replaced.
Leave a comment:
-
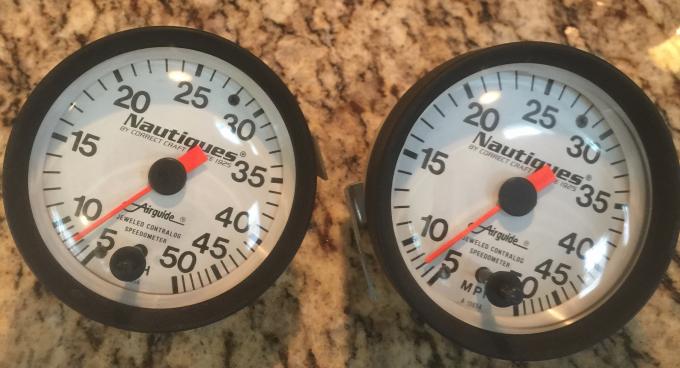
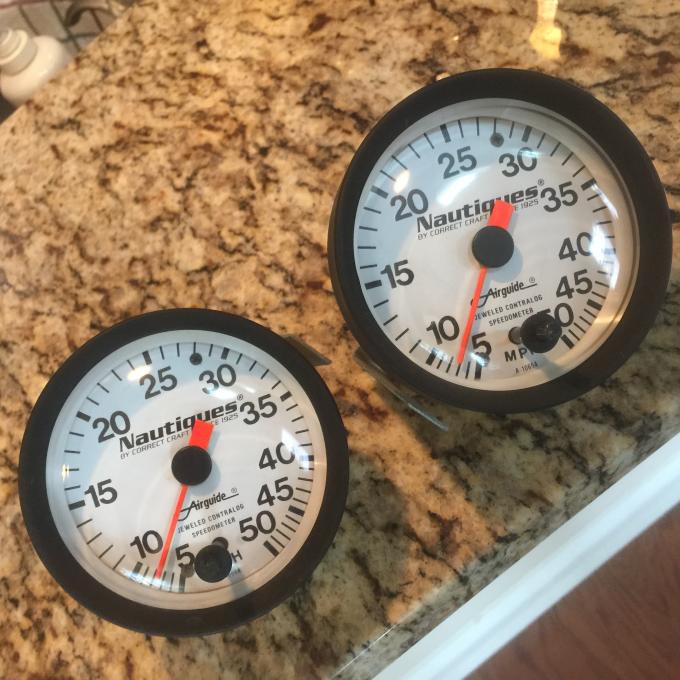
Airguide restoration is complete, and I am so happy with the results! I thoroughly cleaned the faces, painted the needles the proper factory orange, replaced the grommets for the adjustment knobs, and replaced the lenses. They look brand new now!
Before:

After:
Leave a comment:
-
Yes, I do.
I looked at the 1998 Nautique brochure (available on this site) to verify proper placement. Then I used masking tape to tape them in place, measuring the distance from the top and bottom of the green stripe to make sure they were centered. This is tricky since the stripe is not the same width for the entire length of the boat. I then ran a full-length piece of tape across the top with no breaks in it. Once they were taped in place properly, I made cuts separating each letter, so that each letter was hanging from the tape individually, and they could be applied one-at-a-time. This allows you to work with a set of smaller decals instead of one huge one. Then you just flip one up, remove the backing, and use a squeegee to apply the letter, starting at the top and pulling toward the bottom. Repeat for each letter, and you're done!Leave a comment:
-
Do you have any tips or mind sharing your process of applying the side decals? Im undergoing a similar restoration process with my 2002 SAN and new graphics are on the list of things to do.Leave a comment:
-
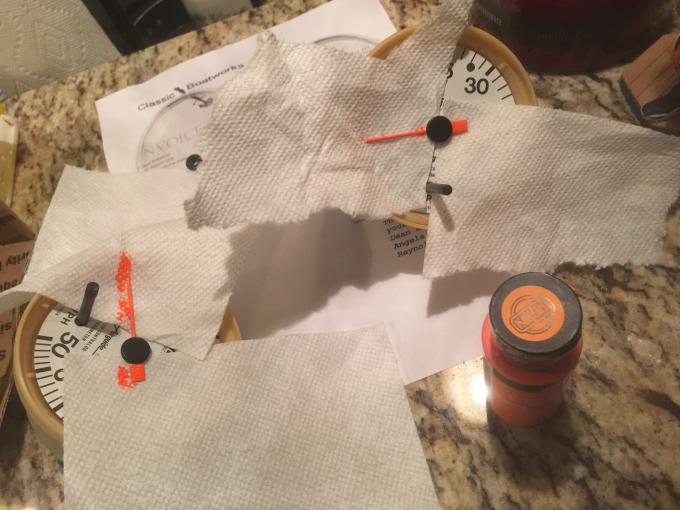
A little more work on the Airguides tonight. May need one more coat tomorrow, but looking MUCH better. The needles had faded to white, and I finally found the proper orange to use on the needles today.
Leave a comment:
-
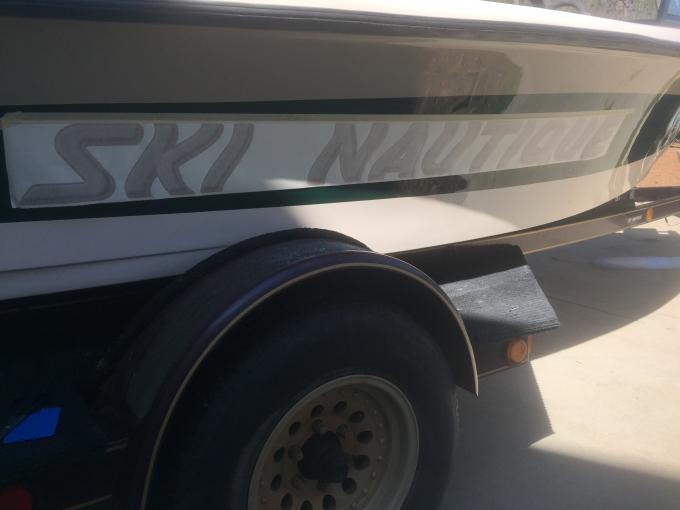
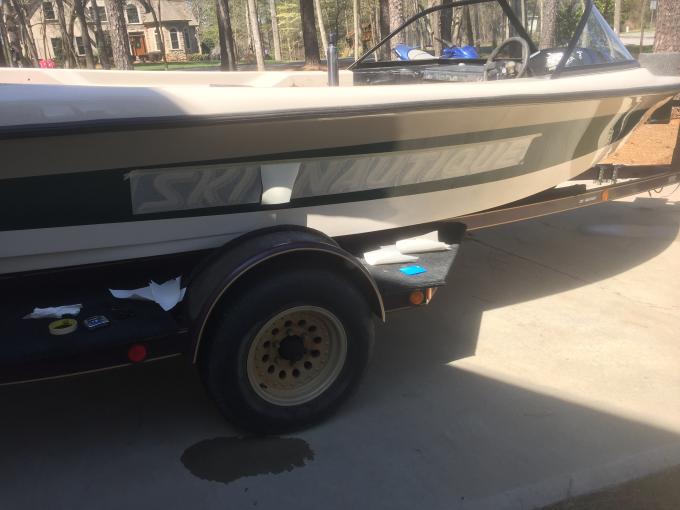
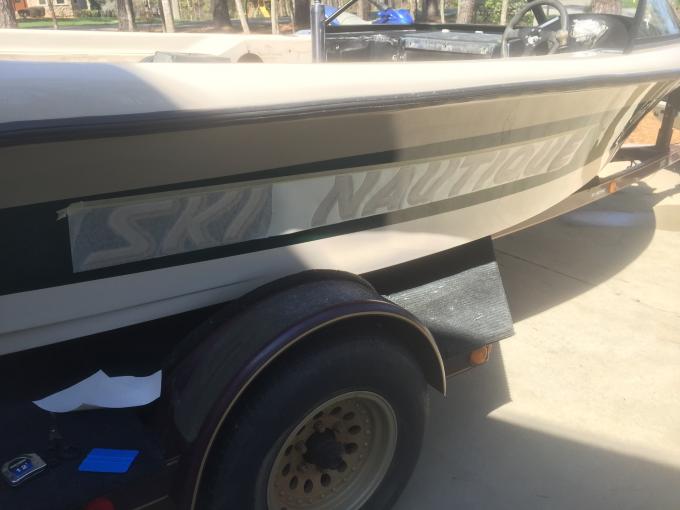
Well, the passenger side has graphics now! On the driver's side, in direct sunlight, I could still see the outline of the old letters, so I am taking it back to the gelcoat place on Monday for some additional sanding and buffing on that side. Won't take them long! Once that's finished, I will be heading down to the SeaDek factory. I will drop the boat off with them on Wednesday. Things are really progressing!

Leave a comment:


Leave a comment: