


-
Good info... I had the same experience with a large fuel tank in my RV. I won't install another lever-based sender if I can help it. You can ohm the old sender and measure the depth of the tank and use this style sender in nearly any application. I forget the name of the online sales I used. They do a bunch of tanks and senders for motorsports applications and are made in the USA. Mine was about $60 and you can order by 1/2" increments. -
I have been having a terrible time with the fuel level sender in this boat. The old (lever style) sending units are practically impossible to get into the tank without bending the rod, which makes them useless. I tried two new lever style sending units, and I broke both of them trying to install them.
Today I decided to try installing an 11.5" straight style sender in my fuel tank. This is the part made for the 220 rear ballast tanks, but was also used for 211 fuel tanks. I was told it wouldn't fit, I'd have to remove the gas tank from the boat to even try, etc. NOT TRUE! I was able to remove the old sender and install this new one in less than ten minutes, and it works perfectly! It is much more accurate than the old lever style sender EVER was.
If you have a Ski Nautique with the straight gas tank (not the L-shaped tank), this sender is what you want! It is so nice to have a working (and accurate) fuel gauge!
https://www.nautiqueparts.com/produc...-for-211-2004/
Leave a comment:
-
I'm not sure if that issue is with the lenses or the gauge face. Either way, the Classic Boatwork website has the replacement parts, including the lenses and the faces. They even have the needles.
http://www.classicboatwork.com/class...e/agr/agr.html
Here's a shot of my gauges that was taken a couple of days ago. They are holding up great so far. I replaced the lenses and painted the original needles, but did not replace the faces.
Leave a comment:
-
Jeff did these lenses correct the yellowish tint that most older nautiques seem to have in the original speedo airguide gauges? Looking at buying a 93 in good condition but did notice the speedos on instrument cluster appear to be faded to a yellowish tint while all the other gauges look clear. I haven't seen the boat yet in person so just want to know what to expect. Just a new lens needed or is the discoloration due to the dial itself. Thanks.Originally posted by NautiqueJeff View Post
Leave a comment:
-
My list of favorite boats of all time- 1983 2001, 1979 SN, 1993 Stars and Stripes MC, and the very top is the exact color 1998 SN!
You've done a wonderful job, extremely impressed with the detail especially finding the GPS speedometer that will replicate the old Air Guides. Love it, love it, love it!Leave a comment:
-
Leave a comment:
-
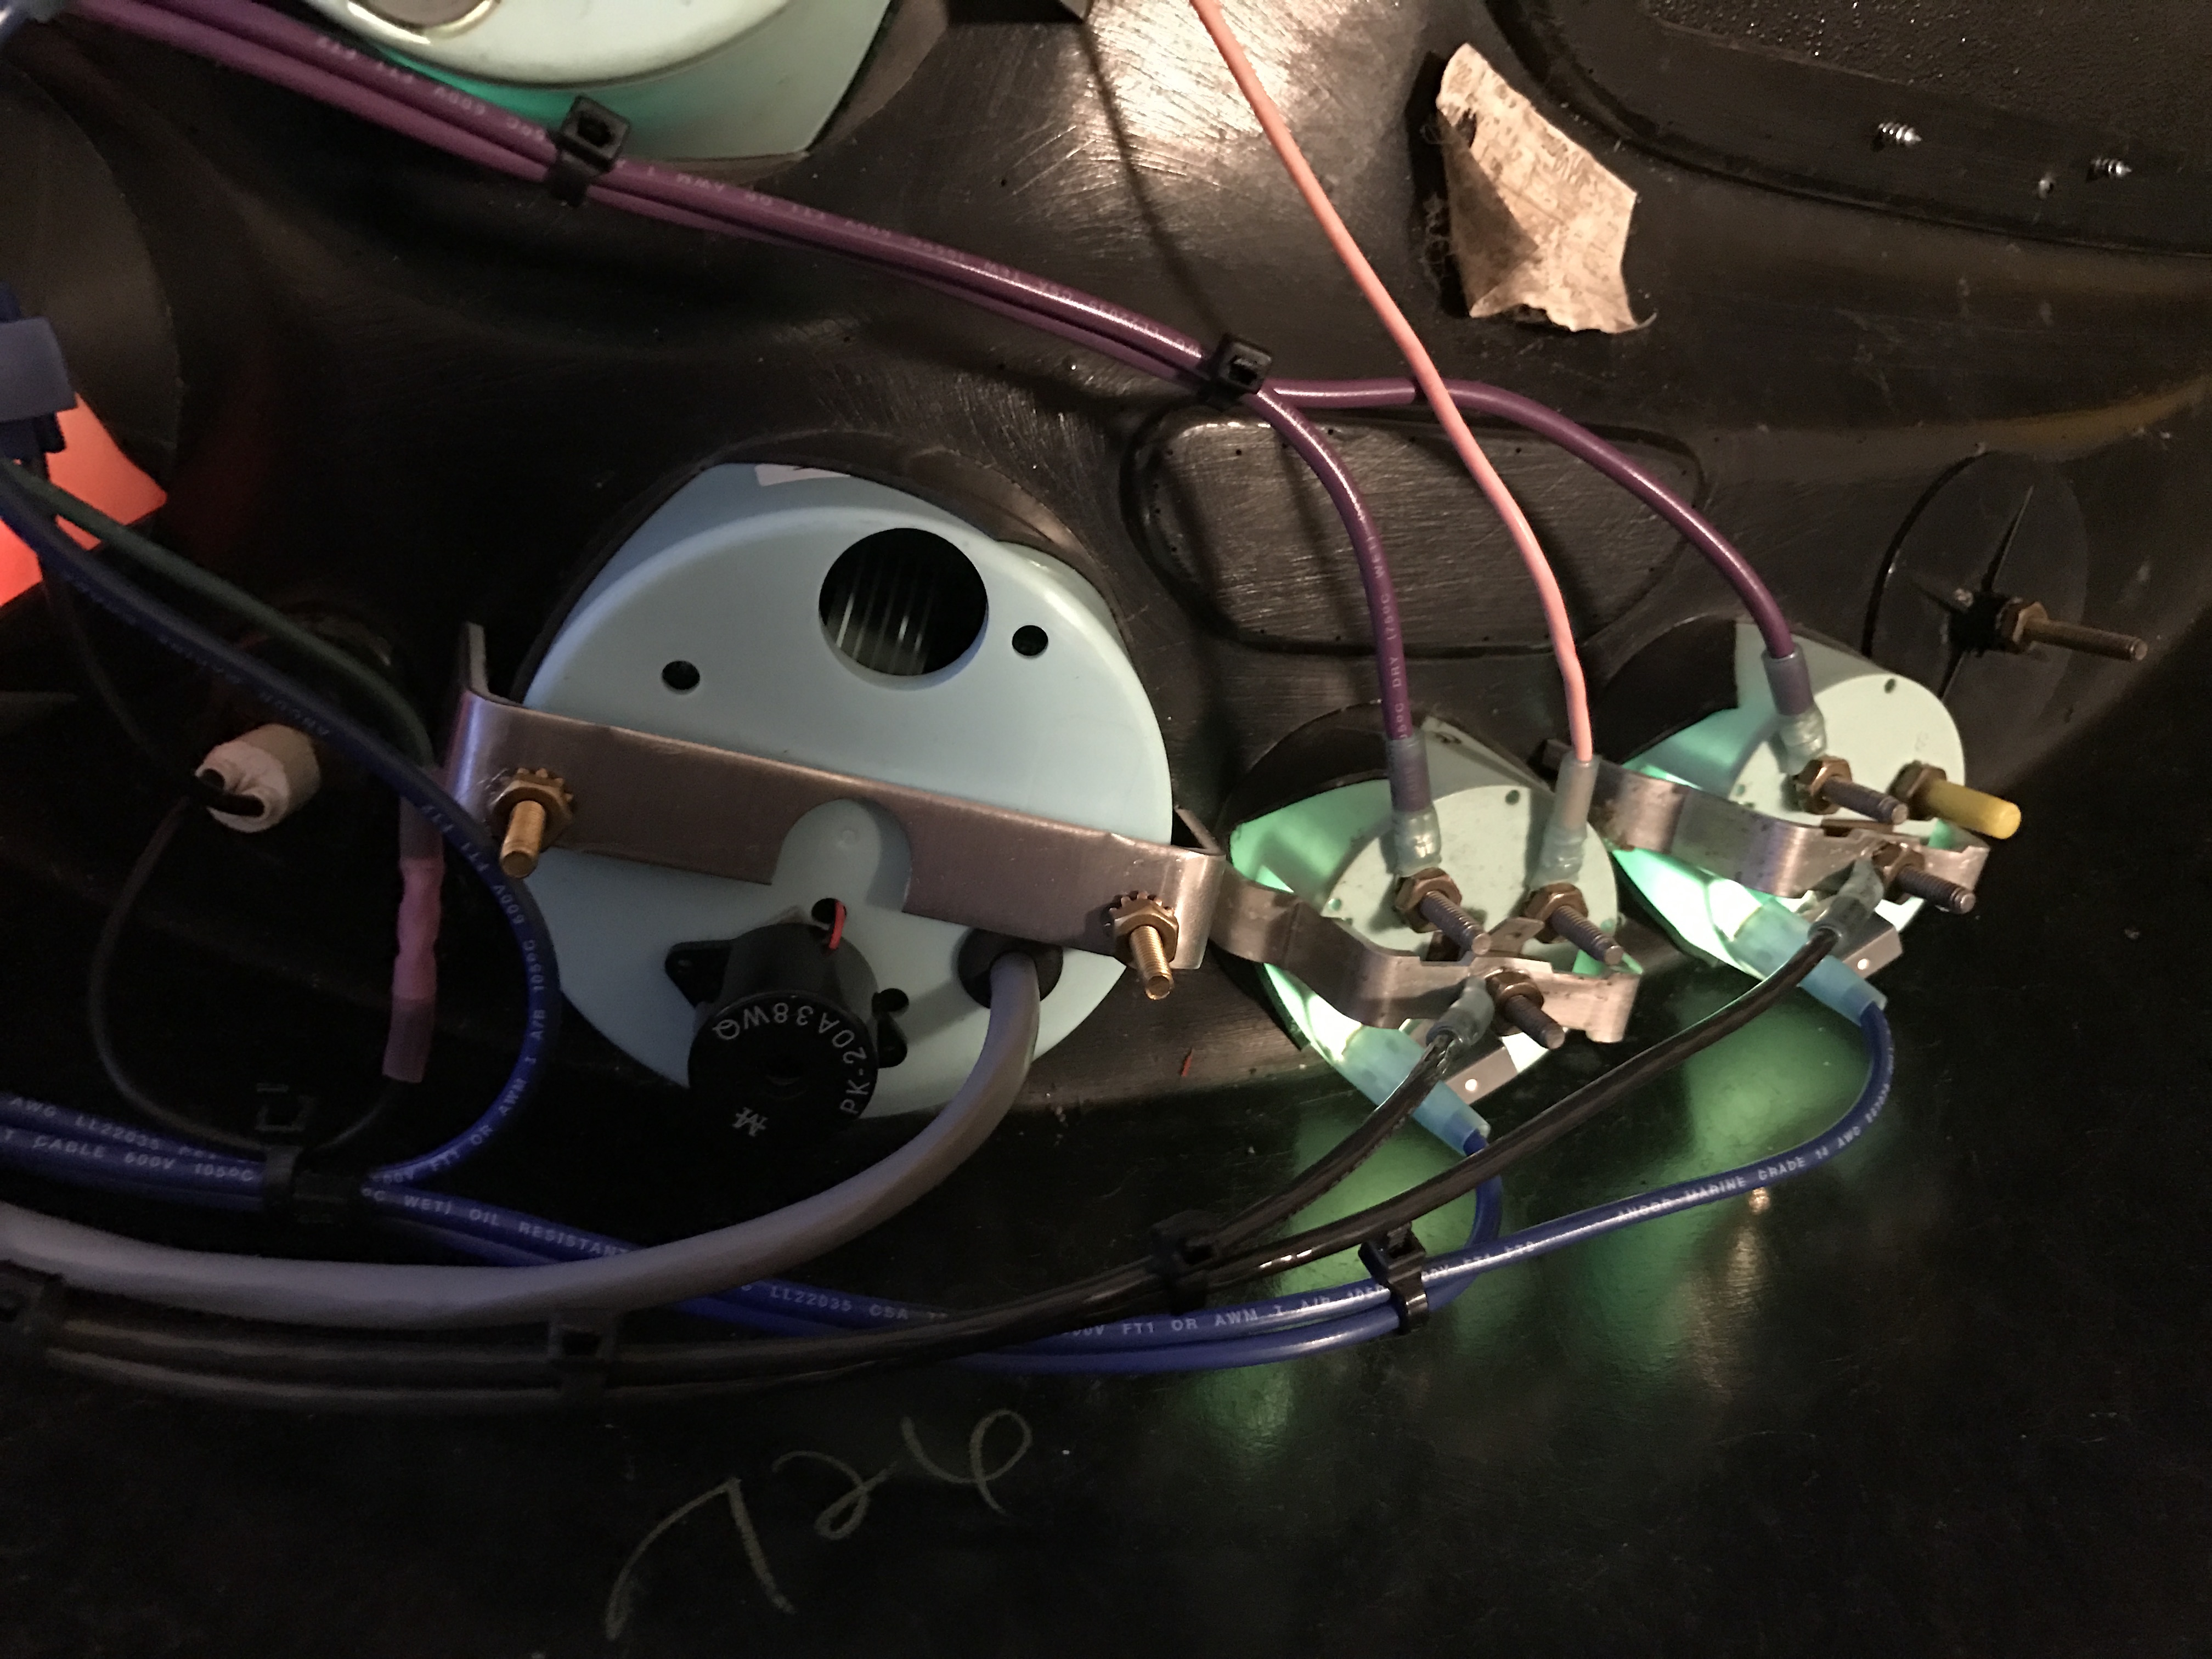
Today I ordered the replacement temperature and oil pressure gauges from NautiqueParts. I also pulled the dash back out of the boat and decided to clean up the wiring a little more than I had already.
From the factory, the purple power wires to all of the gauges (power with ignition breaker and key on) are all daisy-chained! Same thing with the blue power wires for the lights. The ground wires for the gauges are the same as well! Many of these use spade connectors, and many of the factory connections have two or three wires joined together at each connection. The wiring from the factory isn't marine grade, and the connectors are not adhesive or shrink connectors.
I removed all of this factory wiring, and installed three bus bars -- one for the grounds, one for the purple power wires, and one for the blue power wires for the lights in the gauges. I then ran all new wiring to each gauge individually, and installed the proper connectors on each end. I eliminated spade connectors where possible and replaced with ring terminals with adhesive and shrink. The only place I couldn't install ring terminals was on the light connections on the gauges.
I also adjusted the light sockets a bit so that everything was nice and tight, and now all of the lights work properly.
I also ordered the NauticLaugic AirGLide GPS retrofit kit for the one AirGuide speedometer I still have in place. This eliminates the air lines and pitot tubes, and allows the speedometer to be GPS accurate at all times. This is especially beneficial for me because we have a muskrat that lives near our dock, and he loves to eat rubber lines. He destroyed my pitot tubes last week!


Leave a comment:
-
Thanks, everyone!
I tested out the Roswell Nightwater Pro underwater light tonight. Wow, is this thing bright, especially for just a single 2" light!

Leave a comment:
-
^^^ Absolutely! The gold standard in restoration... Im
going to miss checking my phone everyday for jeffs 1998 nautique restoration updates!
Leave a comment:
-
Looks gorgeous and great job on everything, attention to detail at its best.Leave a comment:


Leave a comment: