


Below is an article I put together a number of years ago to help our members winterize their boats. It is mainly for owners who have early GM engines (Pro-Sport, Excalibur, ZR-6 and Python) and 2002 - 2012 model year boats. Please refer to your Owner's Manual for additional recommendations regarding any information below.
Newer boats have different requirements.
Since there are many requests for this type of information, I am making this topic a sticky.
 It is getting close to that time of year for some of us. With freezing temperatures on the way, it is important to take every precaution to help protect your engine and other valuable marine components.
PlanetNautique has compiled a step-by-step process designed to help you winterize your Correct Craft. These procedures are specifically for boats that have GM engines (PCM Pro-Sport, PCM Excalibur, PCM ZR-6, and PCM Python). Owners of Ford engines may get some benefit from reviewing these procedures, but PlanetNautique recommends contacting your local dealer for specific instructions on winterizing Ford engines.
These instructions are for informational purposes only. They are not meant to replace any instructions you have been given by your local dealer or PCM (although most of these instructions come directly from the PCM manual). We believe them to be complete and accurate, but PlanetNautique takes no responsibility for any damage caused by using these instructions.
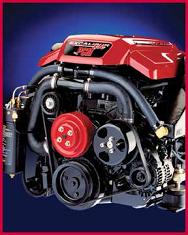
These procedures are meant ONLY for the following GM engines:
PCM Pro-Sport 275 HP
PCM Excalibur 330 HP
PCM ZR-6 375 HP
PCM ZR-390 HP
PCM Python 425 HP
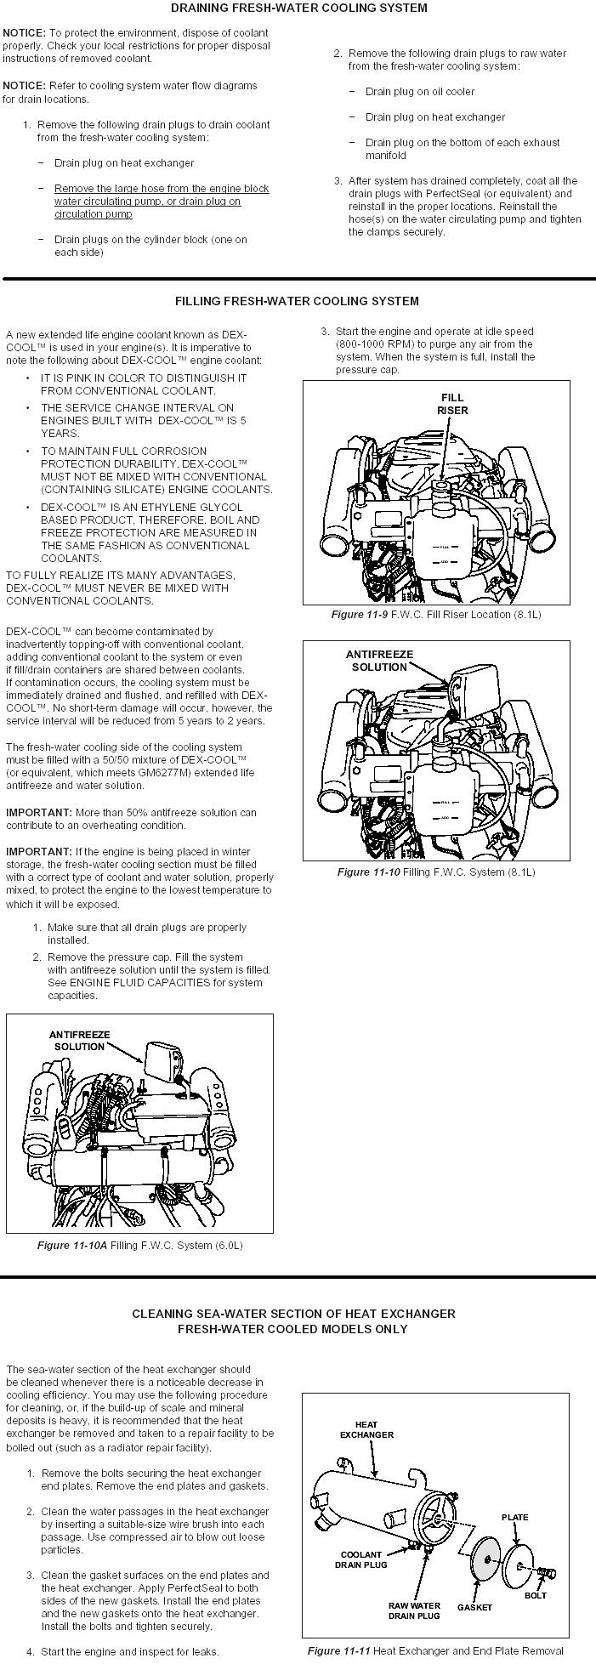
Step 1. (CLOSED COOLING MODELS ONLY)
Drain and replace the engine coolant.
Step 2.
Condition Fuel System
Step 3.
Change Engine Oil
Start engine and allow it to warm up to normal operating temperature. Be sure to supply a source of cooling water during this process. Products such as Fake-A-Lake or Flush-Pro can be used, however the preferred method is to disconnect the raw water hose from the thru-hull fitting and place the end in a five-gallon bucket that receives a constant water source (like water from a garden hose). Be sure that the flow of the water is enough to keep the engine from being starved for water. Allow the engine to run this way until normal operating temperature is reached and the thermostat has opened fully.
Shut down the engine, and change the oil using the following procedure. Locate the engine oil drain hose. It should be clipped on the side of your engine. It will have a metal drain plug installed, and will lead down to the bottom of the crankcase. Unclip this hose, and run it down through your bilge and out through the bilge drain plug hole. Open the plug on the end of the hose, and allow the engine oil to drain. Due to the size of this hose, it takes a few minutes for all of the oil to drain. Let it drain as long as possible to ensure that most of the old oil is out of the engine. While the old oil is draining, replace your oil filter with a MotorCraft FL-1A (or similar) filter. Even though your engine is a GM, the oil filter relocation kit that PCM uses accepts FORD size oil filters. Be sure to coat the rubber O-ring of the new filter with a light coating of fresh oil. Also, be certain that the O-ring from the old oil filter comes off with the old filter. Do not allow it to stay on the filter mounting location. Do not overtorque the new filter. Once all old oil has drained out, replace the plug on the end of the oil drain hose, and pull it back into position inside the bilge. Clip it to the side of the engine. Add the proper amount of fresh oil to your engine. The Excalibur takes four quarts, the ZR-6 takes five quarts, and the Python takes seven quarts. Be sure to check the oil level with the boat level, and add any additional oil necessary to bring the level up to the full mark on the dipstick. Follow the chart below as to which viscosity of oil you should use in your engine.

Step 4.
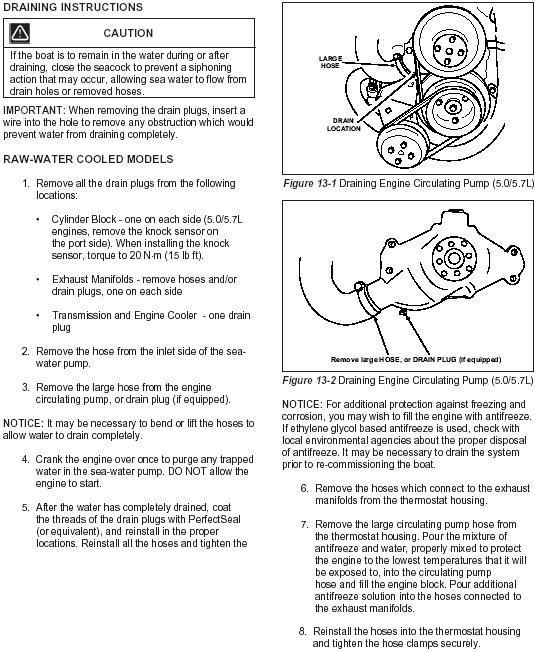
Drain All Water From Engine
(Be careful! The water will be HOT!)
FRESH-WATER COOLED MODELS (Closed Cooling Systems):
RAW-WATER COOLED MODELS (Open Cooling Systems):
Step 5.
Winterize Heater*, Shower* and Speedometer(s)
(* = If Equipped)
The speedometer pitot tubes and lines also need to be purged. To do this, take a compressed air nozzle and hold it perpendicular to the pick up tube. Hold your finger against the other side of the tube so that the air hits your finger. You don't want to blow the air directly into the tube. When the air hits your finger, it works the water out of the tube.
If you have an optional heater installed in your boat, it is very important that you drain all water from this system. The heater core is very sensitive to freezing, and can easily crack. Disconnect the hot water line from the engine block. This line is usually red. Disconnect the hot water return line. Force compressed air into one of the lines until all water is forced out of the system. Using a funnel, pour marine anti-freeze into the sending line until it flows out of the return line. Reconnect all lines to their original locations.
If you have an optional shower installed, that must also be winterized. Disconnect the hot line from the block, close the cold valve and turn the pump on. This will purge the hot line. Next turn off the hot valve and open the cold valve to purge that line. Pump marine anti-freeze through each line using the shower pump.
Step 6.
Add Marine Anti-Freeze To Engine
After completing the procedures above, you might want to add marine antifreeze to the engine and related components. This will provide extra protection from freezing, and will also aid in corrosion resistance. The best way to do this is to disconnect the raw water hose from the thru-hull fitting, and place it into a five-gallon bucket filled with marine antifreeze (usually pink in color). Do not dilute marine antifreeze with water! Be sure all drain plugs have been reinstalled into their proper locations as outlined in the procedures above. Start the engine and let it run until all antifreeze has been drawn into the engine.
Step 7.
Drain Ballast Tanks And Lines
Rear ballast tanks should be drained prior to winter storage. Open all valves and allow water to drain. Use compressed air to completely dry the tanks.
Center ballast tanks are not removable. There is a small red drain plug that can be removed to allow all water to be removed from the center tank. Open all valves and allow water to drain. Use compressed air to completely dry the center tank.
Step 8.
Lubricate Throttle And Transmission Cables
Use an aerosol fogging oil or other similar oil to lubricate the throttle and transmission cables. Apply the product, then work the cable so that the oil is dispersed. It is also a good idea to apply an anti-corrosive agent to the battery terminals at this time.
A Statement About Fogging Oil
There are conflicting ideologies on using fogging oil in PCM engines. Some people prefer not to use fogging oil because they feel that it causes failure of certain sensors. Others feel that fogging oil should be used. There are also a number of different methods used to apply fogging oil to fuel-injected engines. PlanetNautique suggests that you contact your local dealer for their recommendation on the use of fogging oil and the method most appropriate to apply it to your engine.
Newer boats have different requirements.
Since there are many requests for this type of information, I am making this topic a sticky.
It is getting close to that time of year for some of us. With freezing temperatures on the way, it is important to take every precaution to help protect your engine and other valuable marine components.PlanetNautique has compiled a step-by-step process designed to help you winterize your Correct Craft. These procedures are specifically for boats that have GM engines (PCM Pro-Sport, PCM Excalibur, PCM ZR-6, and PCM Python). Owners of Ford engines may get some benefit from reviewing these procedures, but PlanetNautique recommends contacting your local dealer for specific instructions on winterizing Ford engines.
These instructions are for informational purposes only. They are not meant to replace any instructions you have been given by your local dealer or PCM (although most of these instructions come directly from the PCM manual). We believe them to be complete and accurate, but PlanetNautique takes no responsibility for any damage caused by using these instructions.
These procedures are meant ONLY for the following GM engines:
PCM Pro-Sport 275 HP
PCM Excalibur 330 HP
PCM ZR-6 375 HP
PCM ZR-390 HP
PCM Python 425 HP
Step 1. (CLOSED COOLING MODELS ONLY)
Drain and replace the engine coolant.
Step 2.
Condition Fuel System
Step 3.
Change Engine Oil
Start engine and allow it to warm up to normal operating temperature. Be sure to supply a source of cooling water during this process. Products such as Fake-A-Lake or Flush-Pro can be used, however the preferred method is to disconnect the raw water hose from the thru-hull fitting and place the end in a five-gallon bucket that receives a constant water source (like water from a garden hose). Be sure that the flow of the water is enough to keep the engine from being starved for water. Allow the engine to run this way until normal operating temperature is reached and the thermostat has opened fully.
Shut down the engine, and change the oil using the following procedure. Locate the engine oil drain hose. It should be clipped on the side of your engine. It will have a metal drain plug installed, and will lead down to the bottom of the crankcase. Unclip this hose, and run it down through your bilge and out through the bilge drain plug hole. Open the plug on the end of the hose, and allow the engine oil to drain. Due to the size of this hose, it takes a few minutes for all of the oil to drain. Let it drain as long as possible to ensure that most of the old oil is out of the engine. While the old oil is draining, replace your oil filter with a MotorCraft FL-1A (or similar) filter. Even though your engine is a GM, the oil filter relocation kit that PCM uses accepts FORD size oil filters. Be sure to coat the rubber O-ring of the new filter with a light coating of fresh oil. Also, be certain that the O-ring from the old oil filter comes off with the old filter. Do not allow it to stay on the filter mounting location. Do not overtorque the new filter. Once all old oil has drained out, replace the plug on the end of the oil drain hose, and pull it back into position inside the bilge. Clip it to the side of the engine. Add the proper amount of fresh oil to your engine. The Excalibur takes four quarts, the ZR-6 takes five quarts, and the Python takes seven quarts. Be sure to check the oil level with the boat level, and add any additional oil necessary to bring the level up to the full mark on the dipstick. Follow the chart below as to which viscosity of oil you should use in your engine.
Step 4.
Drain All Water From Engine
(Be careful! The water will be HOT!)
FRESH-WATER COOLED MODELS (Closed Cooling Systems):
RAW-WATER COOLED MODELS (Open Cooling Systems):
Step 5.
Winterize Heater*, Shower* and Speedometer(s)
(* = If Equipped)
The speedometer pitot tubes and lines also need to be purged. To do this, take a compressed air nozzle and hold it perpendicular to the pick up tube. Hold your finger against the other side of the tube so that the air hits your finger. You don't want to blow the air directly into the tube. When the air hits your finger, it works the water out of the tube.
If you have an optional heater installed in your boat, it is very important that you drain all water from this system. The heater core is very sensitive to freezing, and can easily crack. Disconnect the hot water line from the engine block. This line is usually red. Disconnect the hot water return line. Force compressed air into one of the lines until all water is forced out of the system. Using a funnel, pour marine anti-freeze into the sending line until it flows out of the return line. Reconnect all lines to their original locations.
If you have an optional shower installed, that must also be winterized. Disconnect the hot line from the block, close the cold valve and turn the pump on. This will purge the hot line. Next turn off the hot valve and open the cold valve to purge that line. Pump marine anti-freeze through each line using the shower pump.
Step 6.
Add Marine Anti-Freeze To Engine
After completing the procedures above, you might want to add marine antifreeze to the engine and related components. This will provide extra protection from freezing, and will also aid in corrosion resistance. The best way to do this is to disconnect the raw water hose from the thru-hull fitting, and place it into a five-gallon bucket filled with marine antifreeze (usually pink in color). Do not dilute marine antifreeze with water! Be sure all drain plugs have been reinstalled into their proper locations as outlined in the procedures above. Start the engine and let it run until all antifreeze has been drawn into the engine.
Step 7.
Drain Ballast Tanks And Lines
Rear ballast tanks should be drained prior to winter storage. Open all valves and allow water to drain. Use compressed air to completely dry the tanks.
Center ballast tanks are not removable. There is a small red drain plug that can be removed to allow all water to be removed from the center tank. Open all valves and allow water to drain. Use compressed air to completely dry the center tank.
Step 8.
Lubricate Throttle And Transmission Cables
Use an aerosol fogging oil or other similar oil to lubricate the throttle and transmission cables. Apply the product, then work the cable so that the oil is dispersed. It is also a good idea to apply an anti-corrosive agent to the battery terminals at this time.
A Statement About Fogging Oil
There are conflicting ideologies on using fogging oil in PCM engines. Some people prefer not to use fogging oil because they feel that it causes failure of certain sensors. Others feel that fogging oil should be used. There are also a number of different methods used to apply fogging oil to fuel-injected engines. PlanetNautique suggests that you contact your local dealer for their recommendation on the use of fogging oil and the method most appropriate to apply it to your engine.


Comment